Unity sparkles

The last blog covered a lot of setup for using particle effects, and a basic texture, but not much else. This one will show how to create our own textures and then use them to make a pretty, sparkly effect.
This blog has been heavily inspired by a YouTube tutorial by a person named Mirza who makes what seems to be a very cool asset for Unity called Ultimate VFX. When I say heavily inspired, I mean close to a rip-off, but I'm covering it for two main reasons. One, I'm going to cover a few little things I found helpful when following the original tutorial, and two, following this tutorial helped me understand how to create particle effects, and how easy it actually is.
There's also a third reason, and that's I don't like video tutorials as a concept. They're a good addition to a decent tutorial (which, to be fair, mine probably aren't), but I don't like following them as I always have to keep pausing and rewinding.
Anyway, what we're trying to accomplish is something that looks like the following. This uses two particle systems to create some nice dots, and some pretty stars. Particle effects tend to make everything look a lot more lived-in and alive, and also a lot more awesome, like Breath of the Wild.
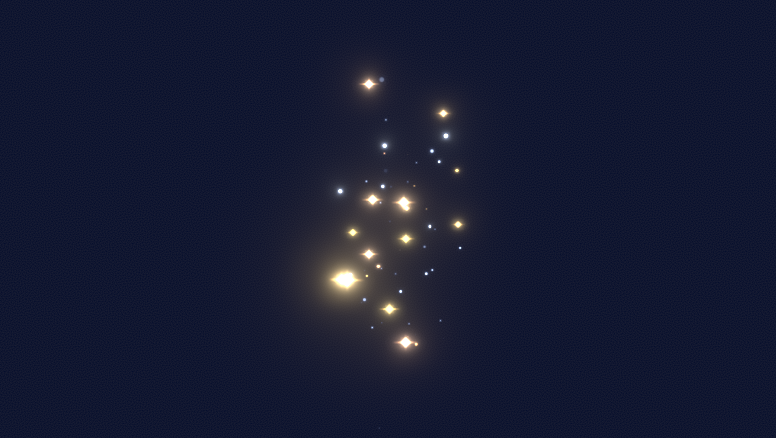
Most interesting particle effects tend to use at least 3 or 4 various effects together to create what they're trying to achieve, but you do eventually reach a point of diminishing returns - maybe at about 50 effects? 100?
Creating the particles
We need two particles for our effect, so open Photoshop and create a file that's 512px x 512px and a black background. 512px should be enough to create a simple effect that looks good without being too large (and taking up excess memory) and without being too small and losing detail. You can choose any colour you want for the background, but we're going to make our particles white, so black's easier to see what we're doing.
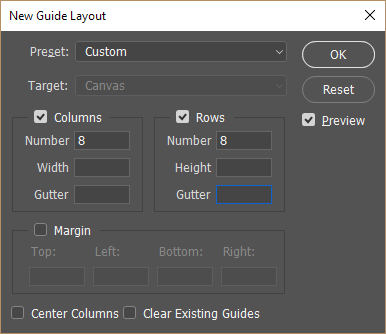
Next, create a grid as it's going to help a lot with lining up your particles. To do this, go to View > New Guide Layout and use the following settings. If you want to hide / re-show your grids in future, you can use the shortcut Ctrl-h. The reason we're using 8 rows and 8 columns is it works nicely with 512 and isn't too big or small.
The last bit of setup required is to have your Layers window open (Window > Layers) and double-click on your Background layer to turn it into a Layer. This'll allow us to disable it for saving so we can save with a transparent background.
Our first particle is going to be a simple mote, so select the Ellipse Tool from the toolbar (Window > Tools) (it can be hidden behind other shapes like rectangle or gelatinous blob so you may need to long-click on it to find the ellipse tool).
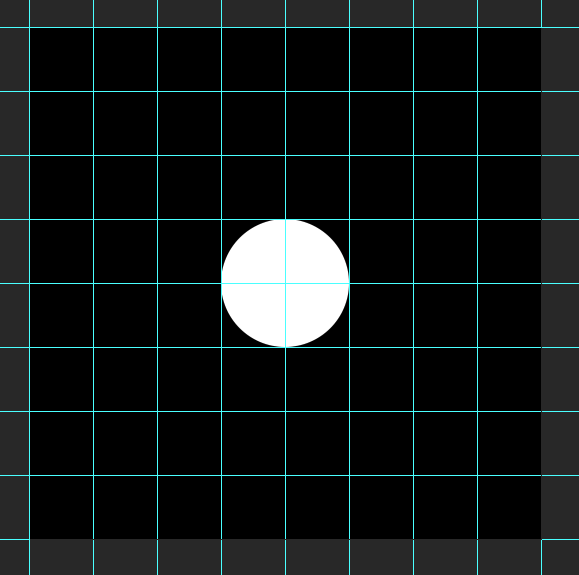
Create a circle in the middle of your canvas. The ellipse should snap to your grid when drawing it, which makes it nice and simple. This will be our template for this particle, as in we're going to use this to generate our actual texture but make sure we hide this circle on save.
Duplicate this layer using either Ctrl-j, or Layer > New > Layer Via Copy and then hide the original. We're going to apply a Gaussian Blur to our circle to soften the edges. Go to Filter > Blur > Gaussian Blur and if it asks to convert to a Smart Object, say yes.
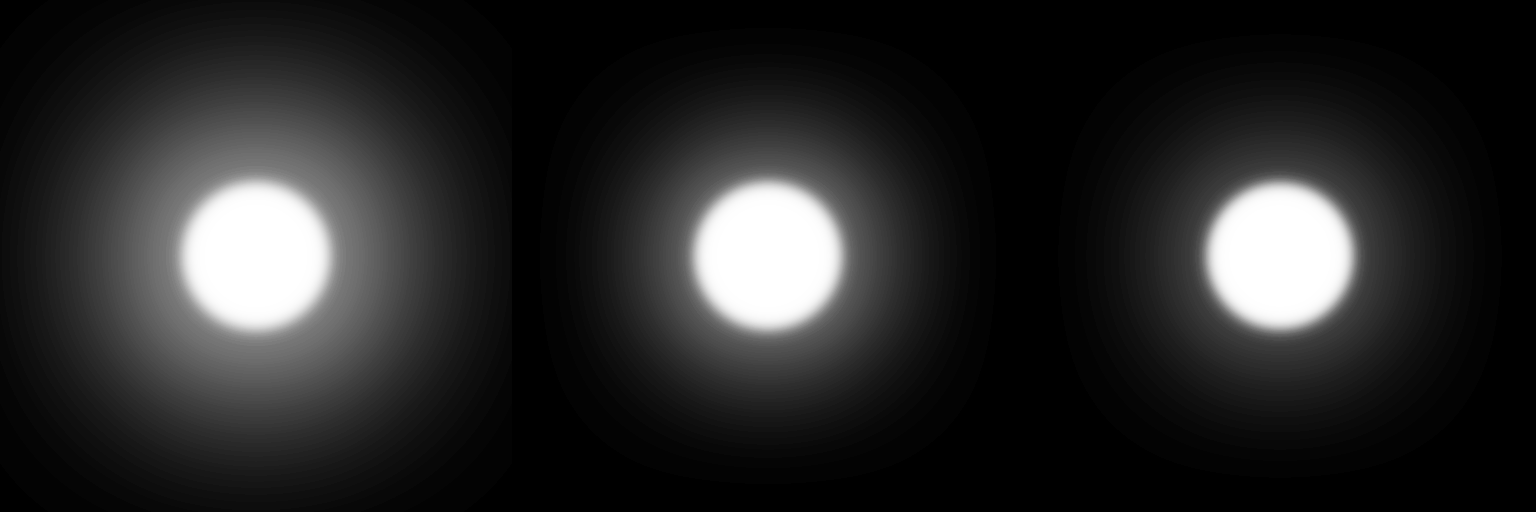
The higher the radius in a Gaussian blur, the less like the object it looks. I want my motes to still have a fairly solid centre of white, as it works best with bloom, so I chose a radius of about 10px. Click OK to apply that and then create a Layer style of Outer Glow. You can do this by double-clicking on your layer to open the Layer Style window, or by going to Layer > Layer Style > Outer Glow... . Use the settings or something similar from below.
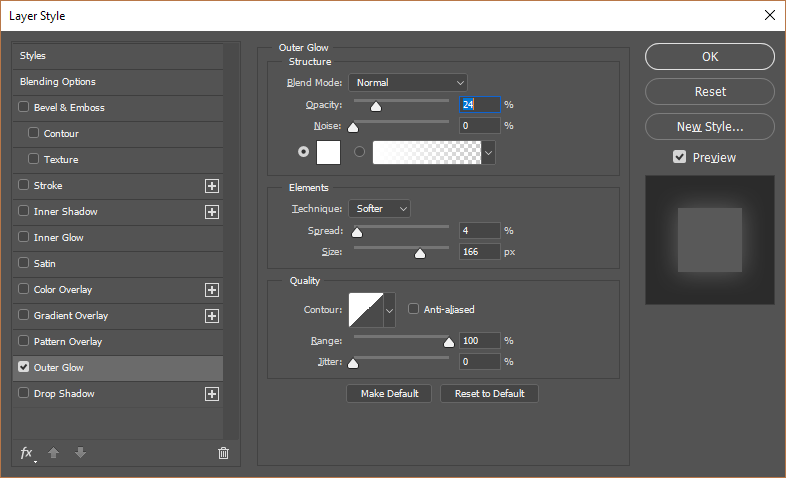
This outer glow creates a bloom-like effect for the particle, so you'd be best to tailor it to how much bloom you're going to use in your game. If you create too-intense an outer glow, the bloom will look weird, so I've chosen values for subtlety. I didn't on the first attempt. It took some trial and error and I'd recommend doing the same. Trial a few different designs of particle to see if you can find one that works better than the rest.
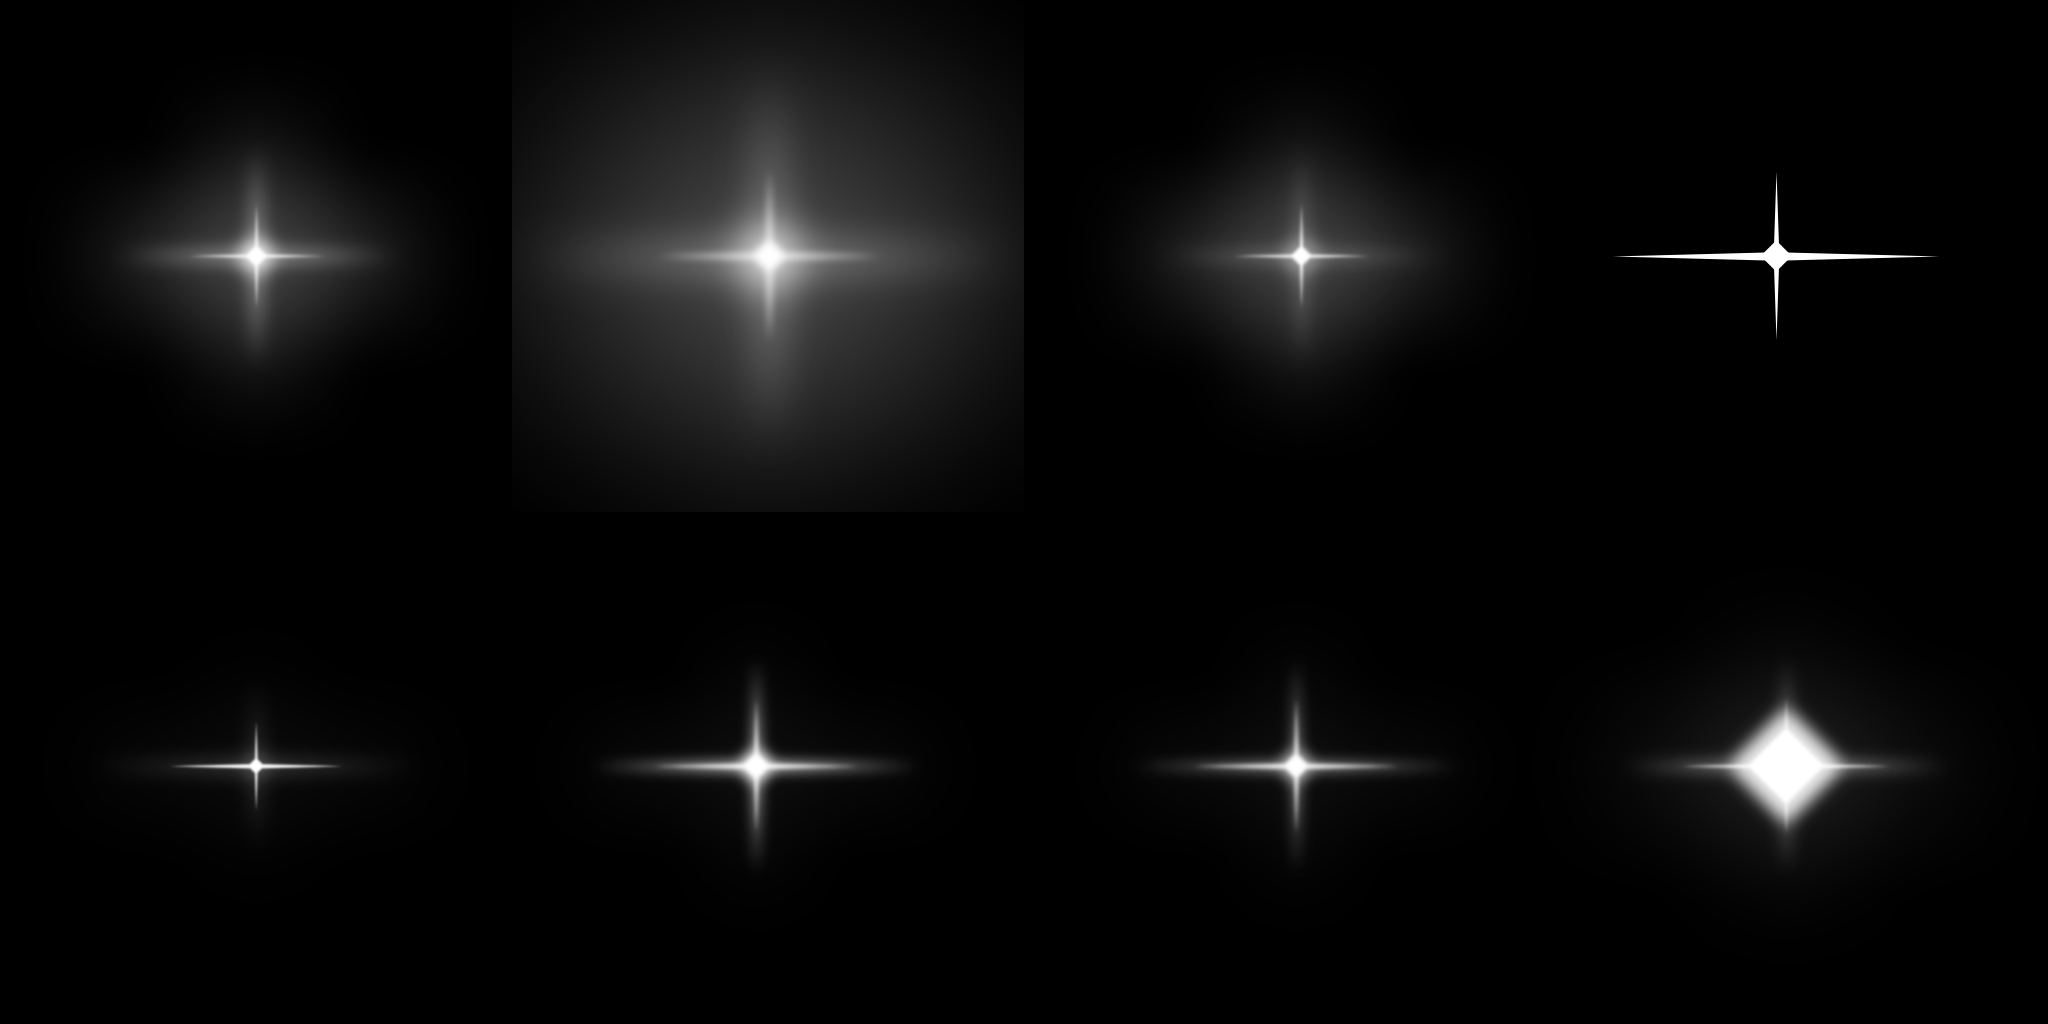
One thing it is important to make sure of is that your outer glow cannot hit the side of your image. If the edges aren't all pure black (or transparent when we've finished), it'll look terrible. I've upped the brightness on the 3 particles below to show the options I went through with this.
On to the second particle then. This is a little, twinkly star that took quite a few attempts to find one I liked. Using our grid from before, create a square in the middle, and then rotate it by 45 degrees (Ctrl-t (Edit > Free Transform) and hold Shift while rotating will limit it to 15 degree angles).
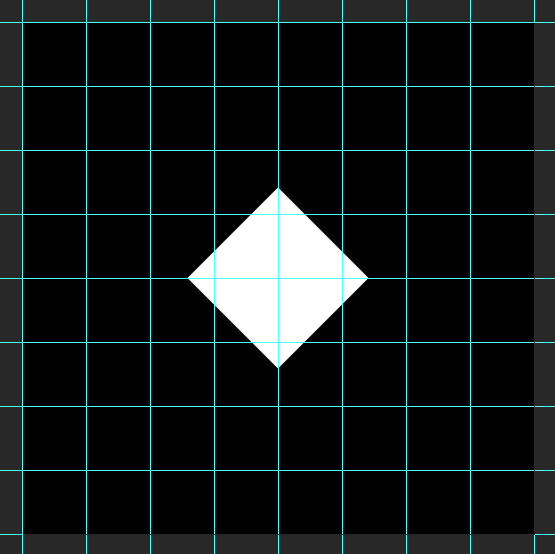
Duplicate this diamond and make one wide and thin, and the other tall and thin. To change their sizes, press Ctrl-t to enter free transform mode, and hold Alt to scale around the pivot point (that little circle in the middle of the diamond). Then just grab the side you want to scale and drag it around until it feels right. Avoid getting too close to the edge as we're going to use Outer Glow on this object as well.
You may want to change the size of the diamond to feel better. You can do this easily by entering free transform mode, as before, and then holding both Alt and Shift, so it'll uniformly scale both dimensions around the pivot point.
Group these three diamonds, duplicate the group (as before), and then hide the original. We'll want to flatten this group so we can Gaussian blur it. Do this by pressing Ctrl-e or going to Layer > Merge Layers.
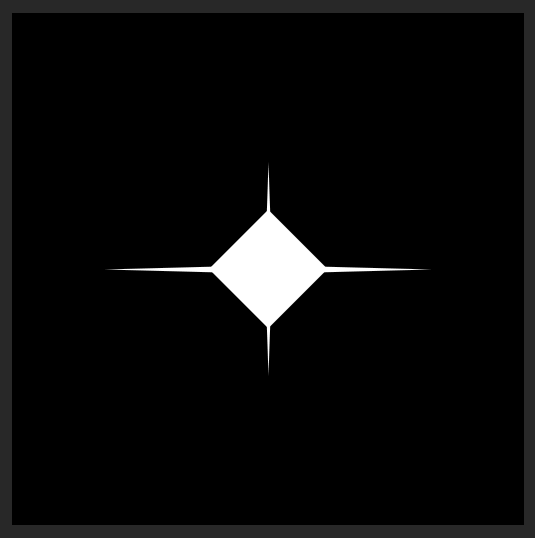
Make a copy of the merged layer and hide it for now. With the visible layer, as with the previous particle, add a Gaussian blur with a radius of 10px. Then, un-hide the merged layer, scale it down so it fits nicely within the blurred image, and then add a small Gaussian blur of about 2 - 3px.
The reason behind this is to strengthen the centre of that particle so it looks like it's glowing. It should look something like the following:
You may want to play with opacity of the larger, blurrier layer. If it's too overpowering, you can lower it's opacity to reduce it's effect.
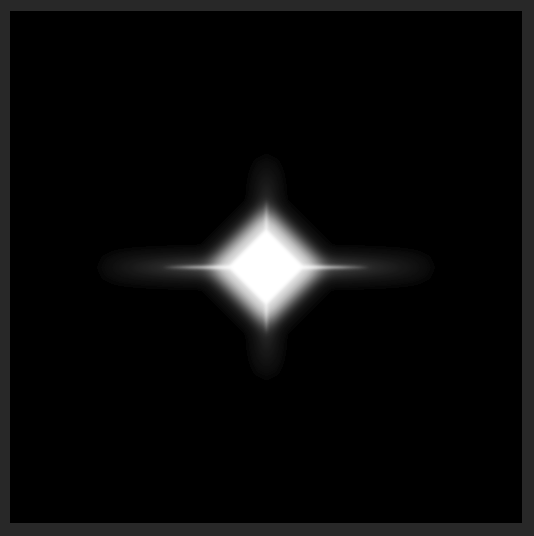
Now group these two layers and add an outer glow. I wanted a very subtle Outer Glow, so lowered the opacity to only 15% for this Layer Style.

This twinkly star took me a while to get something that felt right. I went through 8 different attempts at it until I found something that I liked. These are shown below.
Now we've got our particles, hide all layers that aren't relevant to them, including the black background, and export them as png files.
Importing into Unity
We should now have two (or a lot more) png files that we need to import into Unity. The easy way is to drag them into the Assets part of the Project window. When they appear, they'll likely look odd, with a white background. To fix that, click on each image and use the following settings in the Inspector.
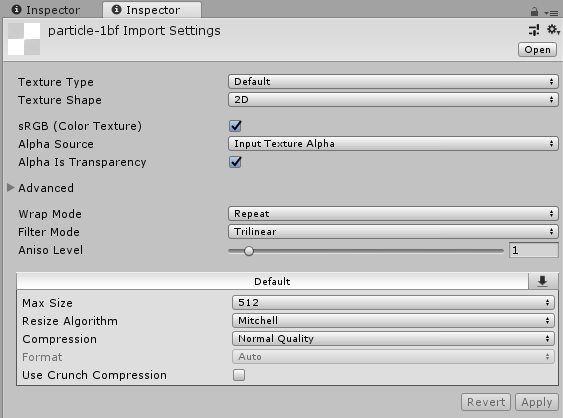
This tells Unity that we should be using the Alpha from the PNG, sets the filter mode to trilinear (as it looks a little better), and lowers the max size to 512, as that's the size of our image.
Now we've got our images into Unity, we need to create some materials for our particle systems to use. Create a new material by right-clicking in the Assets window and going to Create > Material. We want our particles to work with each other and glow beautifully, so we're going to set the Shader to be Particles / Additive.
This'll change the settings available, so drag in our image from the Assets window to the Particle Texture field. Then set the tint colour. I prefer to alter the colour in the particle system itself, so for this texture, set the colour to pure white, including 255 for the alpha, as we did in the previous blog.
Repeat this for the other texture, and we'll move on to our particle systems.
The particle systems
The particle setup could get fairly painful, so I'm going to show the settings and then briefly explain what's changed on each one. Let's start with the mote, or dots, then.
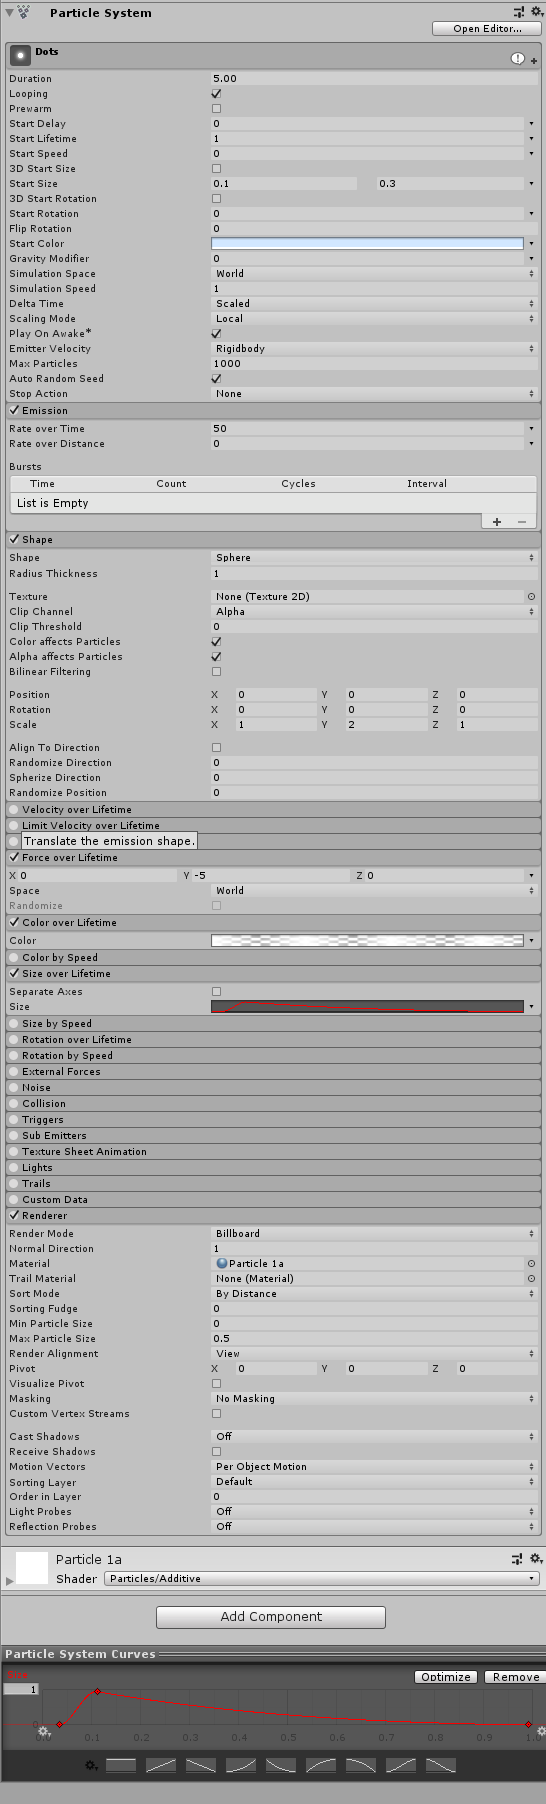
Rather than uniformity, it's nice to have your particles starting at different sizes. These can be accomplished by using the Start Size option. If you click on the little arrow to the right of it's input field(s), you'll get a few options for which values you want to use. In this case, we're using Random between two constants. We've also set all of the dots to a single colour. The reason for doing that here instead of on the image is that we can use randomised colours here as well, or colours over time / speed.
That Start Lifetime is way too long at 5 seconds for our little example. Shrink that to 1 second or something shorter. Making it longer would be a good way to have a taller effect.
We want the Simulation Space to be set to World. This means that if you move the particle system around the world, the particles stay where they were generated instead of being moved with the particle system.
Increase the Emission Rate over Time to something that looks good. This is allows you to have more or less particles and is one of the most useful, and used, options in the particle system.
Rather than produce our particles in a cone shape, we'll switch this to a tall sphere as it'll look nicer for this experiment, so don't forget to alter the scale as well.
Our particles slowly drop down, as if affected by gravity. We could use the various gravity options on the particle system, or we could simply set a downward velocity in Force over Lifetime.
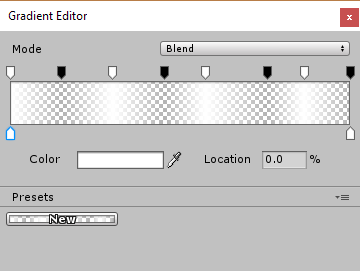
We want these dots to blink in and out, like they're twinkling. We can do this easily with the Colour over Lifetime option. Set up a colour to look something like below. This uses alpha to make the dot look like it's twinkling, and won't override the colour we set above.
It looks a bit crappy if the effects just suddenly appear, so instead we're going to use Size over Lifetime to make them quickly grow to full size, and then slowly shrink again. To accomplish this, we've used the curve as shown at the bottom of the particle system settings.
There are a lot of other options we could use, like collisions are cool, but the last option we're going to demo here is to set the material to our mote particle.
Now the motes, or dots, are set up, duplicate that particle system. We're going to use a very similar one for the twinkles.
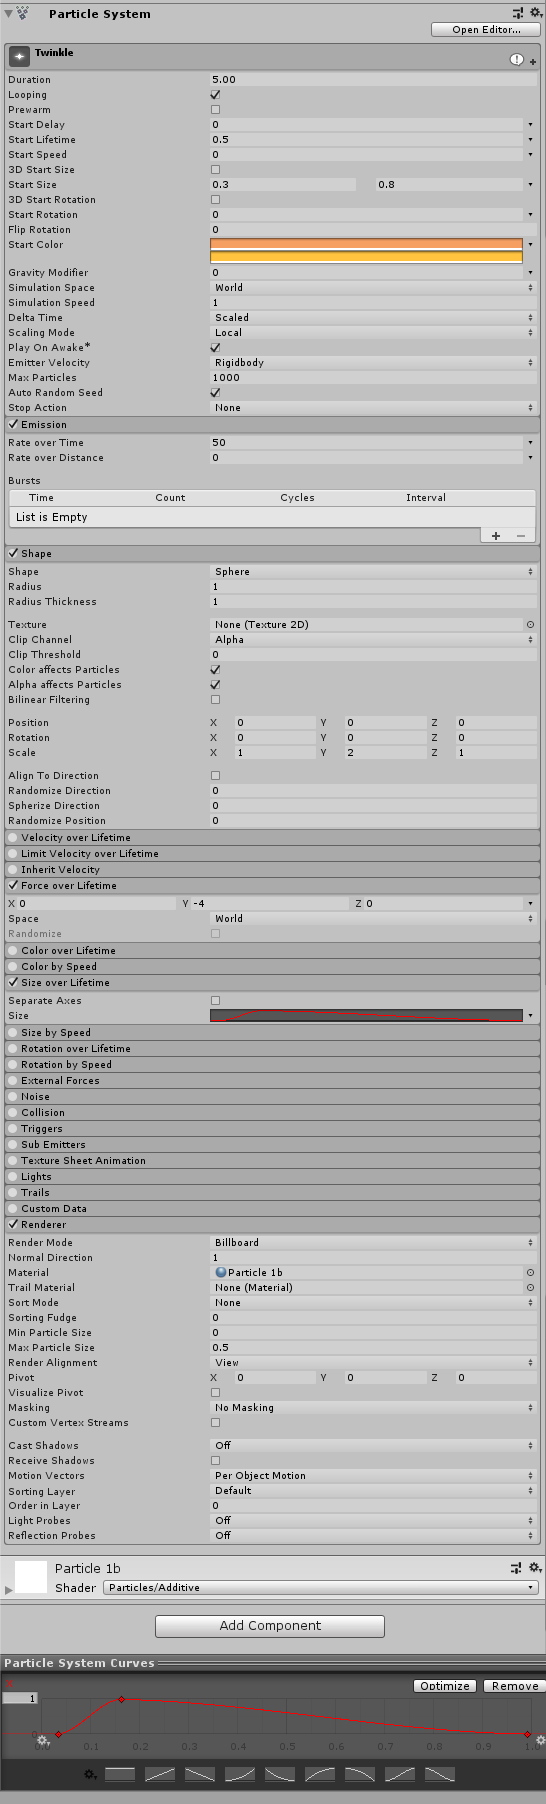
This particle system has an even shorter Start Lifetime, but larger Start Sizes. As the twinkles are the main part of this effect, I've given them two colours they can randomly choose anywhere in between of.
There's a slightly slower Force over Lifetime so they don't drop down so readily, and a less-harsh graph for Size over Lifetime. Lastly, the correct material is chosen for this particle.
The end result should look something like: