Special effects in Unity

With some relatively recent changes in Unity, making any game look cool is quite easy. This is every useful for gamejams, where you've likely taken a number of shortcuts and now have an hour left to make it pretty.
This blog is a two-parter and going to cover how to set up a basic post-processing effect in Unity. First, using Unity's built-in particle graphic, and then later covering creating our own particles in Photoshop and importing them.
Post-processing affects what the camera sees, nothing else. This means that if you layer multiple cameras on top of each other, you can have layered post-processing effects, but each camera layer will add their own effects on top of whatever was there before. If you want to have a separate camera for effects, then you'll need to render it to a texture and then merge it in to the main camera manually.
Unity's post-processing tools are made up of three main parts - the Layer, the Volume, and the Profile.
The Layer is attached to a camera and tells Unity which post-processing volumes to apply (and also fun stuff like Anti-aliasing). There's only one of these per camera, and you may not have them on every camera.
The Volume allows to define when your post-processing effects will be active. These are quite often set to global, so they're always on, but you could, for instance, attach a volume to every spotlight and have them add additional effects to the camera whenever the volume is touching the camera.
Last of the three is the Profile. These store which effects you want to apply. Your volumes will likely use the same, or similar profiles, and you can easily swap profiles programmatically to alter your effects.
First, we're going to need the V2 of Unity's post-processing stack. A lot of the interesting Unity code lives in github, so we'll need to manually download this from github.com/Unity-Technologies/PostProcessing/releases. Download the first *.unitypackage file you see.
The setup
For these special effects to look special and not just plain old effect-y, we're going to need to run through a few steps first. I now tend to replicate these steps for every Unity project I start as they give a nice look to everything.
Ok, create a new Unity project and when it's started, import that unitypackage file from above. If you're using Windows, this is as simple as double-clicking on the file. You'll then see a normal asset import window asking you what to import - just select all and import.
We're going to start by creating a separate game object for storing our post processing effects. The main reason for this is it makes it easy to find our effects and allows us to have the camera on a different layer to the effects (more on this later).
Create the following setup. Both FX and Main camera FX are empty game objects. Note that the Main camera FX game object has it's Layer set to PostProcessing. This is so we can find it later:

As already covered, the Post Process Volume's a great little tool. We've got our set to Is Global, which means that it's always active, but you use its settings to define when the post-processing profile will become active on the camera.
Create a new Profile for this Volume to use by clicking the New button. Then click on the Add effect... button and add Bloom. Set the values to match the value above and that's our effects ready for now.
There are a lot of useful effects in that dropdown, but we're not going to cover them now. All we need to know is bloom makes a simple light colour look like its glowing. How much is controlled by the intensity. The threshold alters when the bloom effect will be applied. I prefer to use 1.1 to make it harder for the light to bloom and spread, in the hope it feels a bit more natural and not too light.
Now we've got our Volume, we'll add a Layer to our camera so it can be applied:

We've made a minor modification to the default camera here by altering the background to be a solid colour. This is simply because our particles test will look better against a flat background. The command buffers are added automatically so we can ignore them.
Add the Post Process Layer component and set the Trigger to this camera by pressing the This button if it's not already. Set the Layer to PostProcessing. This will pick up all Post Process Volumes that belong to a gameobject with the layer of PostProcessing, as our one is above.
For good measure, we've also turned on the most expensive anti-aliasing, because we can and it won't make much difference for these simple demos.
A simple test
We're going to create a very simple test for the effect above, so we know it's working well.
For this test we're going to use the default particle that comes with Unity, but altered slightly so it works better with our post-processing effects.
Create a new material using the following settings:
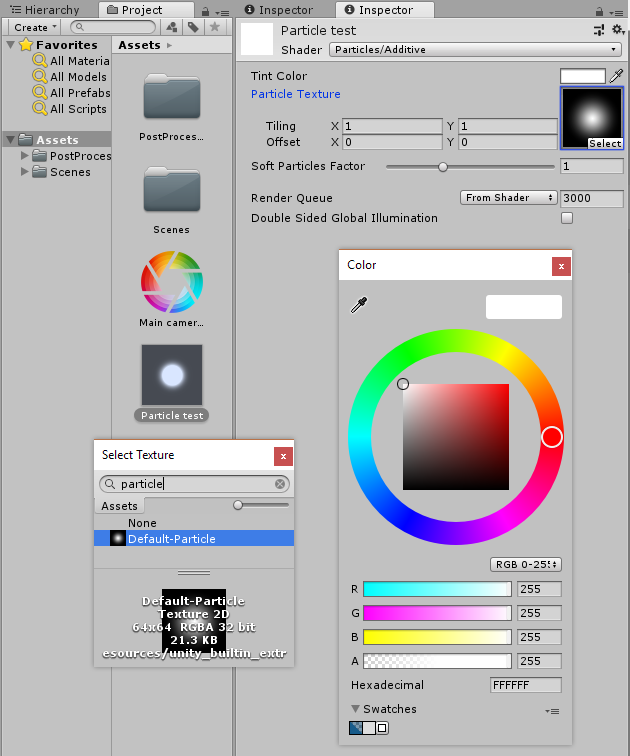
We've altered the tint colour to set the alpha to 255, and use the default particle image as our texture. Otherwise we're going to keep everything the same.
Next up, we're going to set up our particle system in a slightly odd way, but the benefits will (hopefully) become obvious.
First up, we're going to set up an empty particle system, so create a new particle system using GameObject > Effects > Particle System, and then disable all of the particle system options, so your inspector looks like this:
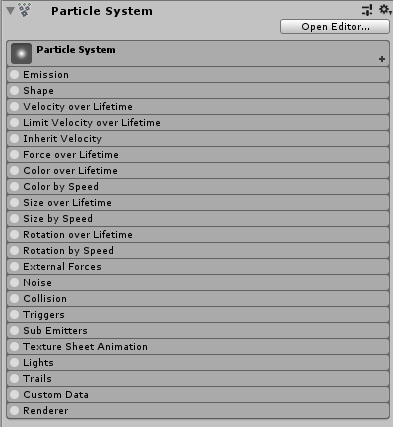
This is our base particle system. We'll add any future particle systems as a child to this one. This is because Unity allows us to play a particle system in the scene view without playing the game. We're going to have multiple particle systems that we want to test at the same time, though, so having them as a child of one makes that testing easy.
Another nicety that we'll add is having 2 inspector windows. This is because Unity will only play the particle system when it's open in the Inspector, but we may want to play with our post-processing effects and keep the simulation running.
To open a second inspector window, click on our parent particle system, and then click on the little lock button to keep our inspector open. Now, right-click on the inspector tab and go to Add Tab > Inspector. This second inspector tab is the one we're going to use for our actual work now. The first, locked one will be used purely to keep our particles running.
With that all set up, let's create a particle system we're actually going to use. Create the following particle system as a child of the first:
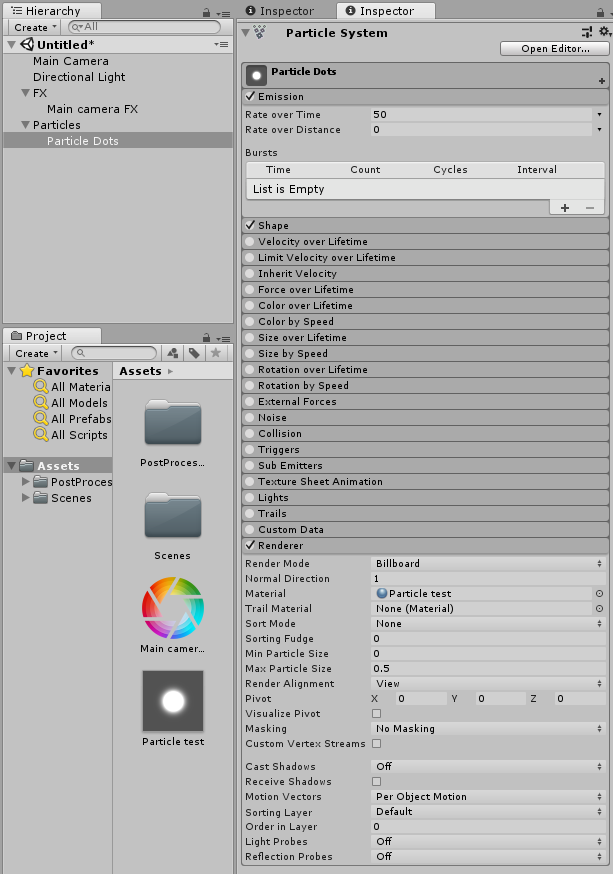
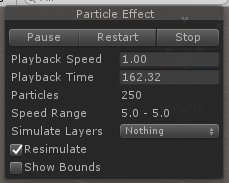
We've upped the emission rate in the example above, and set the material to the particle we created earlier. You should now be able to see particles being created in both your Scene view and Game view. If nothing's happening, you may need to click the Play button on the floating Particle Effect window in your Scene View:
With that playing, let's try changing the Intensity setting in our Main camera FX. The following examples show the difference between an Intensity of 0, 3, and 10. It depends on if you like subtle or eye-catching.

Next time, we'll cover creating how to make some simple sparkles using homemade textures.