Multiplayer 5. The modal manager

The essence of a good UI is control. Leading your users down paths you want them to take in the simplest and shortest manner while minimising the chances of them getting lost. A simple way to do this is to keep them informed on every step and decision they make so that they know they are progressing the way they expect.
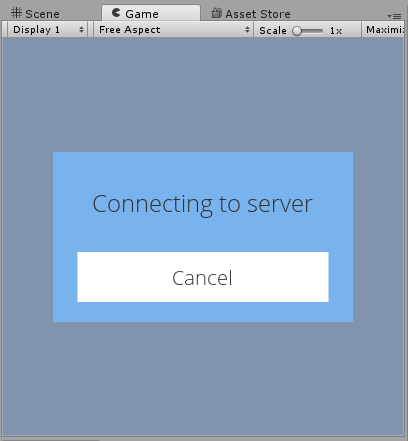
To help them, we're going to build a simple Modal manager. A modal window is a popup you'll display to the user to let them know we're either waiting for something from them, like getting them to agree to soul-owning terms and conditions. We're also going to use it to let them know the game's busy doing something, like trying to connect, and they should hold on a moment.
To keep things simple, we're also going to want to support three types of popup. One is going to be a simple loading box with no buttons. As mentioned before, the job of this is to inform the user that the game is doing "something".
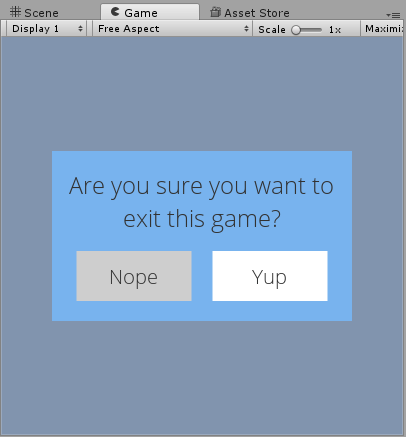
The next type is going to have a single button so we can either let the user know we're doing something and they can cancel it, or we're waiting for their agreement before we proceed. The last type will have two buttons, an ok and a cancel button. We'll use these when we're asking the user a question they need to respond to.
So what do we need to accomplish this? Well, this manager's going to be created in 3 steps. We're going to define the code that controls the modal window, define a manager for that code, and lastly create the UI for it.
Modal control
Let's get started then. The code below handles displaying one of three types of modals, depending on which text labels have been set. Whenever we want to use a new modal we'll create a new instance of it, and when we're done we'll destroy it. As such, we only need to worry about creating and showing a modal as it's never going to be hidden or altered once live.
// Modal/ModalUI.cs

using UnityEngine;
using UnityEngine.UI;

namespace Modal {
    public class ModalUI : MonoBehaviour {

        public GameObject simpleModal;
        public GameObject okModal;
        public GameObject cancelModal;

        public Text simpleTitle;
        public Text okModalTitle;
        public Text okButtonTitle;
        public Text cancelModalTitle;
        public Text cancelOKButtonTitle;
        public Text cancelCancelButtonTitle;

        public delegate void ButtonResponse ();

        private ButtonResponse okButtonResponse;
        private ButtonResponse cancelButtonResponse;

        public ModalUI SetTitleText (string titleText)
        {
            simpleTitle.text = titleText;
            okModalTitle.text = titleText;
            cancelModalTitle.text = titleText;

            return this;
        }

        public ModalUI SetOKButtonText (string okButtonText)
        {
            okButtonTitle.text = okButtonText;
            cancelOKButtonTitle.text = okButtonText;

            return this;
        }

        public ModalUI SetOKButtonResponse (ButtonResponse okResponse)
        {
            okButtonResponse = okResponse;

            return this;
        }

        public ModalUI SetCancelButtonText (string cancelButtonText)
        {
            cancelCancelButtonTitle.text = cancelButtonText;

            return this;
        }

        public ModalUI SetCancelButtonResponse (ButtonResponse cancelResponse)
        {
            cancelButtonResponse = cancelResponse;

            return this;
        }

        public void Show ()
        {
            if (cancelCancelButtonTitle.text != "") {
                cancelModal.SetActive(true);
            }
            else if (okButtonTitle.text != "") {
                okModal.SetActive(true);
            }
            else {
                simpleModal.SetActive(true);
            }
            gameObject.SetActive(true);
        }

        public void OKButtonClick ()
        {
            okButtonResponse();
        }

        public void CancelButtonClick ()
        {
            cancelButtonResponse();
        }
    }
}
All of the Set*() at the top of the class are used to define what our modal will look like and do, setup with a standard method chaining pattern. After they've been set, Show() can be called so the user can see it. The last two methods are called by the modal UI to trigger the callbacks in a neat way.
The modal's boss
Now we have our modal, we need to create it's line manager to tell it what to do. The following code shows a semi-singleton pattern, spliced into a standard MonoBehaviour. It's useful to let Unity do it's magic as a service locator as we can setup a prefab with our modal UI already wired in correctly, but we also want to call this class without any hassle from a number of different locations around our code. We could always pass a reference wherever we need it, but for the sake of speed and a tutorial we're allowing direct access to our instance.
// Modal/ModalManager.cs

using UnityEngine;

namespace Modal {
    public class ModalManager : MonoBehaviour {

        private static ModalManager manager;
        private GameObject existingInstance;
        public GameObject prefab;

        public ModalManager ()
        {
            ModalManager.manager = this;
        }

        public static ModalManager GetInstance ()
        {
            return manager;
        }

        public void Show (string title, string okButtonTitle, string cancelButtonTitle, ModalUI.ButtonResponse okButton, ModalUI.ButtonResponse cancelButton)
        {
            Hide();
            existingInstance = Instantiate(prefab);

            existingInstance.GetComponent<ModalUI>()
                .SetTitleText(title)
                .SetOKButtonText(okButtonTitle)
                .SetOKButtonResponse(okButton)
                .SetCancelButtonText(cancelButtonTitle)
                .SetCancelButtonResponse(cancelButton)
                .Show();
        }

        public void Show (string title, string okButtonTitle, ModalUI.ButtonResponse okButton)
        {
            Show(title, okButtonTitle, "", okButton, null);
        }

        public void Show (string title)
        {
            Show(title, "", "", null, null);
        }

        public void Hide ()
        {
            if (existingInstance) {
                Destroy(existingInstance);
            }
        }
    }
}
It's the manager here that supports the three types of modal window we'll display, and also a method for disposing of our modal once it's complete.
Window dressing
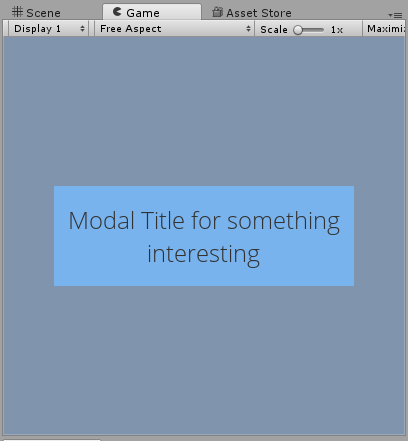
Last up for this, we need to show how it looks and how everything links together. For all of these tutorials we're going to use the same, simple style for everything. This is so you can easily just reskin it in future, or use it as a basis for something a lot more awesome.
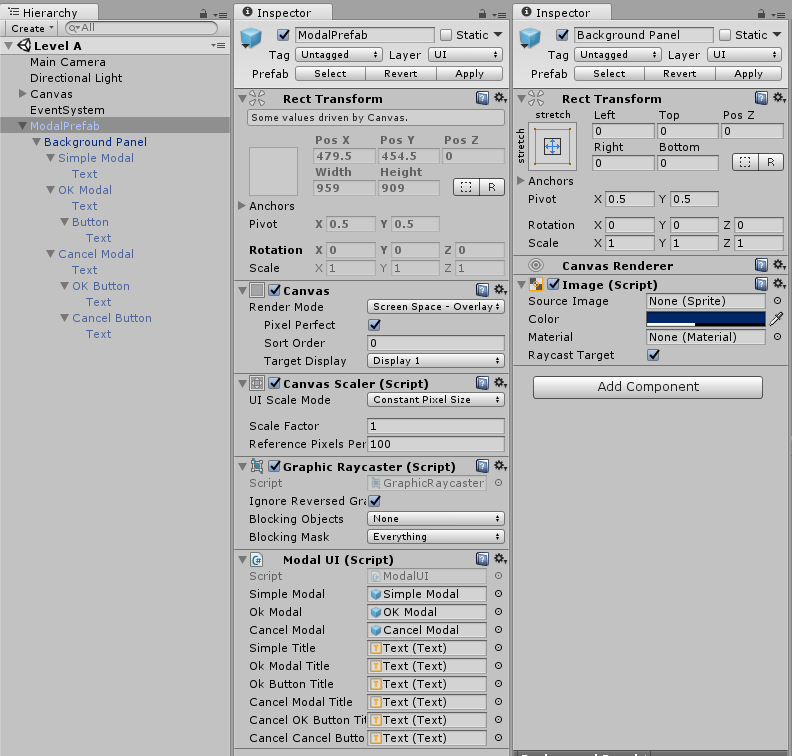
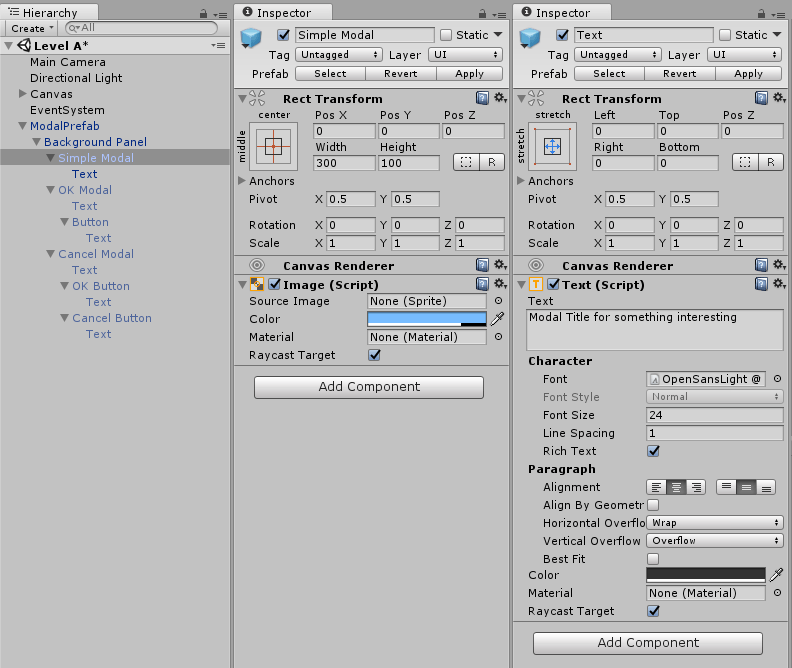
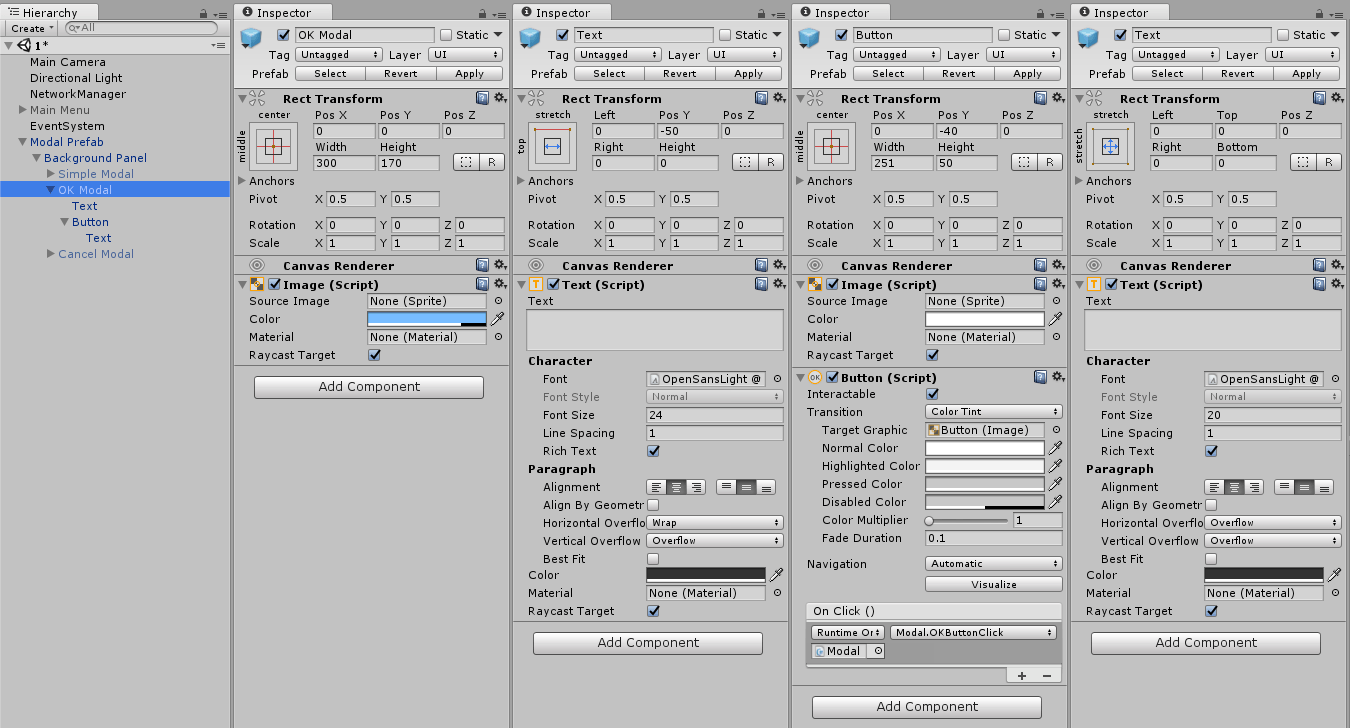
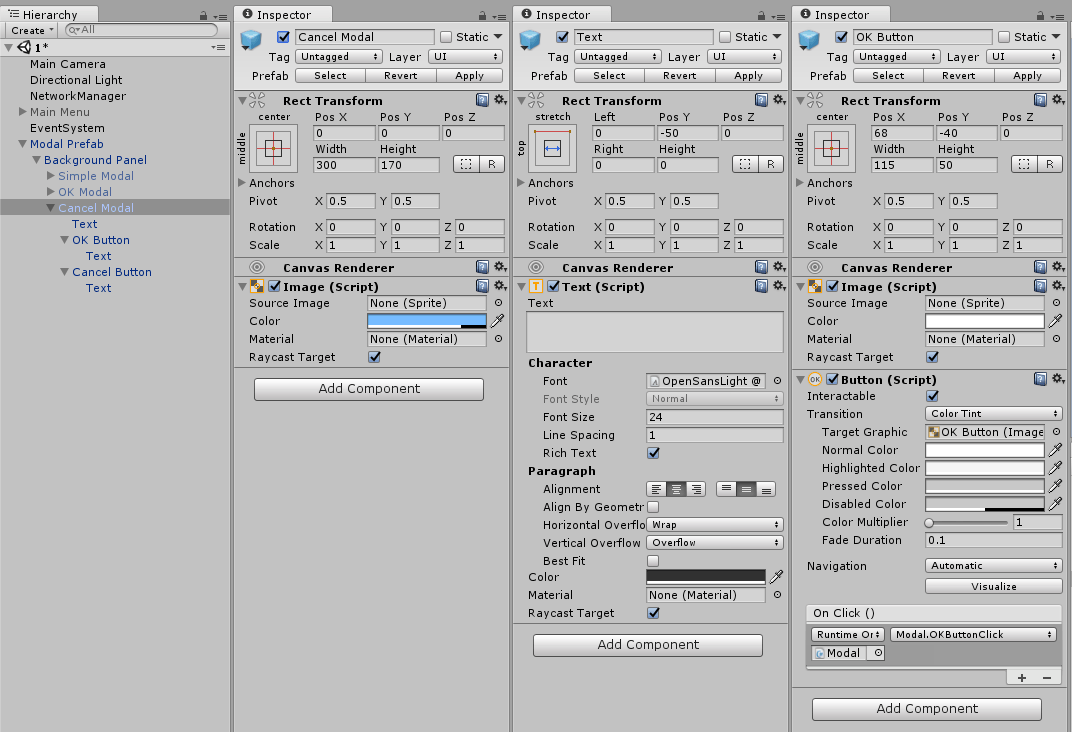
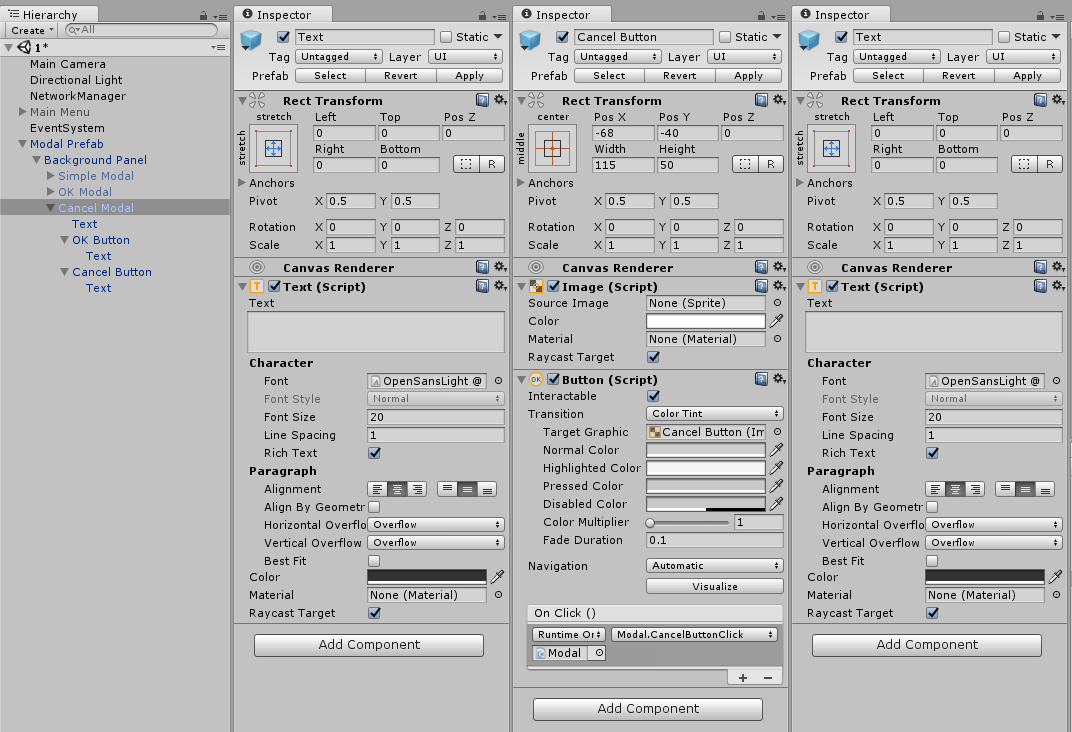
After you've implemented all of the above, check you've linked all titles and buttons back to the main game object, and disabled the modals by default. Then create a prefab of this modal and call it ModalPrefab (original title, I know).
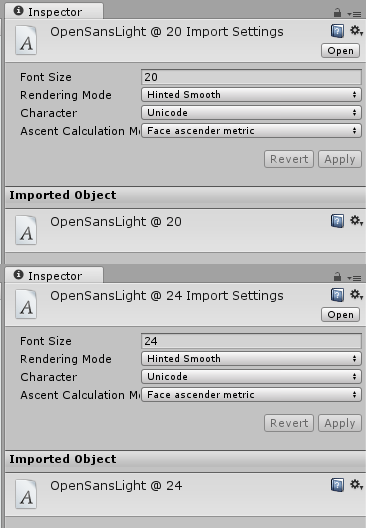
You may notice the fonts used are non-standard and relatively clean (for Unity's standard of fonts). This was achieved by importing a single font twice, at two different sizes. The first is size 20, and the second at size 24.
To do this, import a font simply by adding it to your somewhere in your assets folder. For the UI above I've used the always pretty OpenSans, available for free with a good license terms. Then I've fixed a size and set the import to include all of Unicode (as we don't know yet what we're going to need). You may need to set the rendering mode to either "Hinted Smooth" or "Smooth" depending on the font.
Always end on an example
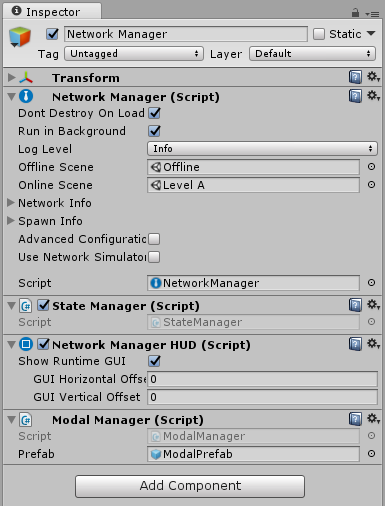
Now we have our modal prefab, it's time to put it into use. We're going to make use of the NetworkManager always existing between scenes in our game by attaching the ModalManager script to it, and then linking the prefab to it.
Doing this will mean the modal manager is instantiated when the game loads, is available in all scenes, and (as it's a singleton) is available to any of the code.
Now it's attached, if we revisit the ChangeSceneButton code from the last blog post, we can add in a check so that whenever someone tries to change scene, a popup will appear for confirmation.
// ChangeSceneButton.cs

using Modal;
using UnityEngine.Networking;

public class ChangeSceneButton : NetworkBehaviour {

    private string storedSceneName;

    [Server]
    public void ChangeScene (string sceneName)
    {
        ModalManager.GetInstance().Show(
            "Ready to load scene '" + sceneName + "'",
            "Do it",
            "Not yet",
            () => {
                NetworkManager.singleton.ServerChangeScene(sceneName);
            },
            () => {
                ModalManager.GetInstance().Hide();
            }
        );
    }
}
Note the use of anonymous functions for the callbacks. I prefer how it looks instead of having additional methods for simple requests.
Possible updates
That's it for the moment. This is the version we're going to use for the rest of these tutorials, but there are some updates you could choose to make. One would be keyboard / controller button shortcuts for the popup buttons.
Another change that could be useful for your game is the possibility of having multiple modal windows layered over each other. This code won't currently allow it but with minor modifications it could do. You'd just need to keep track of the latest layer using a stack.
Next blog we eventually get back to the UI, starting with the main menu.
You can get the source code for the blog post from github.com/dittto/unity-multiplayer-5.