Multiplayer 8. Tick, tock goes the clock

Now we have somewhere for our players to congregate, it's time to start work on something for them to actually do. As in, the actual game, unless you're making a game based on "youths" hanging around newsagents, then you're done. Good job!
Let's work on the assumption that you do actually want to make a game though. We're going to a timer so we know how long the game has to run. You could choose to make a game without a timer, but, for multiplayer at least, those are normally reserved for RTS's, and even they keep some form of time spent, purely to mock you with it at first light, on the fifth day.
We're going to create a simple timer for our game that when it runs out, ends the game and allows the server to take everyone back to the lobby, or quit the game like an insulted 13 year old.
Retrofitting the last blog
Our first task is going to be altering something we just built for the Lobby. We're going to add an entirely new state type for the game to be in. Currently we have Network and Game. These work well for what they cover, but we need more finely-grained options for Game, while still keeping the ability to know if we're connected or not.
To solve this, we're going to add a Level state type. We'll only use level when we know we're online, but it will tell us if we're in the lobby, ready to play the game, currently playing it, or have completed it. We're going to use the ready state yet, but it will allow us time to sync all players before we start, and also to add future steps before starting, like choosing a loadout.
// GameState/State.cs

using System.Collections.Generic;
using UnityEngine;

namespace GameState
{
    ...

    public class State
    {
        ...

        public const string LEVEL_IN_LOBBY = "level_in_lobby";
        public const string LEVEL_NOT_READY = "level_not_ready";
        public const string LEVEL_READY = "level_ready";
        public const string LEVEL_PLAYING = "level_playing";
        public const string LEVEL_COMPLETE = "level_complete";

        ...

        private string levelState;
        private string previousLevelState;

        ...

        private bool isLevelDirty = false;

        ...

        public State Level(string newLevelState)
        {
            if (newLevelState != levelState) {
                previousLevelState = levelState;
                levelState = newLevelState;
                isLevelDirty = true;
            }

            return this;
        }

        public string Level()
        {
            return levelState;
        }

        ...

        public void Publish ()
        {
            // Debug.Log("Publish State: " + networkState + " | " + previousGameState + " > " + gameState + " | " + previousLevelState + " > " + levelState);
            // Debug.Log("Publish dirty state: " + isNetworkDirty + " " + isGameDirty + " " + isLevelDirty);

            foreach (SubscriberOptions subscriberOption in subscribers) {
                PublishIfMatches(subscriberOption);
            }

            isNetworkDirty = false;
            isGameDirty = false;
            isLevelDirty = false;
        }

        private void PublishIfMatches (SubscriberOptions subscriberOption, bool forceDirtyBit = false)
        {
            if (
                subscriberOption.option.Matches(
                    previousNetworkState,
                    previousGameState,
                    previousLevelState,
                    networkState,
                    gameState,
                    levelState,
                    forceDirtyBit ? true : isNetworkDirty,
                    forceDirtyBit ? true : isGameDirty,
                    forceDirtyBit ? true : isLevelDirty
                )
            ) {
                subscriberOption.subscriber();
            }
        }
    }
}
Unlike the Network and the Game states, the Level state won't be controlled by the state manager, so we don't need to make any changes there. Instead we'll move onto the StateOption code that handles setting the state and matching subscribers.
// GameState/StateOption.cs

using UnityEngine;

namespace GameState
{
    public struct StateOption
    {
        ...

        public string oldLevel;
        public string newLevel;

        public StateOption (
            string oldNetworkState = "",
            string oldGameState = "",
            string oldLevelState = "",
            string newNetworkState = "",
            string newGameState = "",
            string newLevelState = ""
        ) {
            ...

            oldLevel = oldLevelState;
            newLevel = newLevelState;
        }

        ...

        public StateOption PreviousLevelState(string oldLevelState)
        {
            oldLevel = oldLevelState;

            return this;
        }

        public StateOption LevelState(string newLevelState)
        {
            newLevel = newLevelState;

            return this;
        }

        public bool Matches(
            string oldNetworkState,
            string oldGameState,
            string oldLevelState,
            string newNetworkState,
            string newGameState,
            string newLevelState,
            bool isNetworkDirty,
            bool isGameDirty,
            bool isLevelDirty
            )
        {
            ...

            if (oldLevel != null && oldLevel != "" && oldLevelState != "" && oldLevel != oldLevelState) {
                return false;
            }

            if (newLevel != null && newLevel != "" && newLevelState != "" && newLevel != newLevelState) {
                return false;
            }

            bool anyDirty = false;

            ...

            if (((oldLevel != null && oldLevel != "") || (newLevel != null && newLevel != "")) && isLevelDirty) {
                anyDirty = true;
            }
            if (!anyDirty) {
                return false;
            }

            return true;
        }
    }
}
As with before, we've just added the ability to add a level to the state option code.
Keeping state
Now we have a new Level state, it's time to make use of it. We're going to trigger the Level state changes from the server and then use RPC calls to the client so they can follow along like little, robotic ducklings. The reason behind this is that since our server is authoritative, it alone makes the decisions about what level we should be on.
We're going to start by going back to the LocalPlayerDataManager(again) as our Lobby isn't entirely 100% complete. If we get the rest of the timer working without this, then our lobby won't reset players properly. This following code will just make sure that our player is_readyflag is always reset, even if they stay online:
// Player/SyncedData/LocalPlayerDataManager.cs

using GameState;
using UnityEngine;
using UnityEngine.Networking;

namespace Player.SyncedData {
    public class LocalPlayerDataManager : NetworkBehaviour {

        ...

        public override void OnStartLocalPlayer()
        {
            LocalPlayerDataStore store = LocalPlayerDataStore.GetInstance();

            State.GetInstance().Subscribe(...);
            State.GetInstance().Subscribe(
                new StateOption().LevelState(State.LEVEL_IN_LOBBY),
                () => {
                    if (clientData != null) {
                        clientData.SetIsReadyFlag(false);
                        clientData.SetIsServerFlag(State.GetInstance().Network() == State.NETWORK_SERVER);
                    }
                    else {
                        store.isReady = false;
                        store.isServer = State.GetInstance().Network() == State.NETWORK_SERVER;
                    }
                }
            );

            CreateDefaultValues();

            ...
        }

        ...
    }
}
Now we've fix bug preemptively, it's time to look forward. Like with the players themselves, we're going to need a simple class for storing the options chosen by the SettingsUI in the lobby. If you remember, the server could choose two settings: The level, and the time the level should take. The level will be implied as we'll actually be on it to play the game, so for this example we'll only need to store the time taken.
// UI/Level/LevelData.cs

namespace UI.Level {
    public class LevelData {

        private static LevelData instance;

        public int levelTime = 0;

        private LevelData() { }

        public static LevelData GetInstance() {
            if (instance == null) {
                instance = new LevelData();
            }

            return instance;
        }


    }
}
This code is yet another simple, stateless singleton. We'll use it for storing the time, in minutes, the game should last. In future, we'll probably have multiple settings in here such as game modifiers, handicaps, etc, but for the moment just the time will do.
Now we have a store, let's store something in it. Go back to the SettingsUI code and we'll add the following changes to it:
// UI/Lobby/SettingsUI.cs

using GameState;
using Modal;
using Player.SyncedData;
using Player.Tracking;
using UI.Level;
using UnityEngine;
using UnityEngine.Networking;
using UnityEngine.UI;

namespace UI.Lobby {
    public class SettingsUI : NetworkBehaviour {

        ...

        public void Awake()
        {
            State.GetInstance()
                .Level(State.LEVEL_IN_LOBBY)
                .Publish();
        }

        ...

        [Server]
        public void StartGame()
        {
            if (!allowServerStart) {
                return;
            }

            ModalManager.GetInstance().Show(
                "Ready to start the game?",
                "Yes!",
                "Not yet...",
                () => {
                    LevelData.GetInstance().levelTime = (serverTimeSelect.value * 5) + 5;
                    RpcUpdateClientStateOnStart();
                    NetworkManager.singleton.ServerChangeScene(serverLevelSelect.value == 0 ? "Level A" : "Level B");
                },
                () => {
                    ModalManager.GetInstance().Hide();
                }
            );
        }

        [ClientRpc]
        private void RpcUpdateClientStateOnStart()
        {
            State.GetInstance()
                .Level(State.LEVEL_NOT_READY)
                .Publish();
        }

        ...
    }
}
See above that it's only when the server starts the game that we store the level time and then send an RPC to all clients to tell them we're no longer in the lobby, and to wait for the game to start.
That's the end of all of the Lobby changes for the Level state, so it's time to tell the world when we're actually in a game.
// Level/LevelStart.cs

using GameState;
using UnityEngine;

namespace Assets.Level {
    class LevelStart:MonoBehaviour {

        public void Start()
        {
            State.GetInstance()
                .Level(State.LEVEL_READY)
                .Publish();
        }
    }
}
This code needs to be attached into every in-game scene and the easiest way to do that is add it to the OnlineUI prefab.

The time is now
Almost there. We've got our extended state working well, so let's get our titular timer into the scene.
The following code uses a coroutine to the keep waiting approximately every second and then reduce the time left by a count of one. To make things easier to test for this blog post we're going to assume that instead of minutes, the game actually lasts a matter of seconds.
// UI/Level/TimerUI.cs

using GameState;
using System.Collections;
using UnityEngine;
using UnityEngine.Networking;
using UnityEngine.UI;

namespace UI.Level {
    public class TimerUI : NetworkBehaviour {

        [SyncVar]
        public int timer = 10;

        public Text timerText;

        public void Awake ()
        {
            timer = LevelData.GetInstance().levelTime;
            SubscribeToServerReady();
        }

        public void Update ()
        {
            timerText.text = Mathf.FloorToInt(timer / 60).ToString().PadLeft(2, '0') + ":" + (timer % 60).ToString().PadLeft(2, '0');
        }

        public void OnDestroy()
        {
            StopAllCoroutines();
        }

        [ServerCallback]
        private void SubscribeToServerReady ()
        {
            State.GetInstance().Subscribe(
                new StateOption()
                    .LevelState(State.LEVEL_READY),
                StartTimer
            );
        }

        [Server]
        private void StartTimer ()
        {
            if (this != null) {
                StartCoroutine(this.WaitForTimerToEnd());
                RpcStartTheGame();
            }
        }

        [Server]
        private IEnumerator WaitForTimerToEnd ()
        {
            while (timer > 0) {
                yield return new WaitForSeconds(1);
                timer--;
            }

            RpcEndTheGame();
        }

        [ClientRpc]
        private void RpcStartTheGame()
        {
            State.GetInstance()
                .Level(State.LEVEL_PLAYING)
                .Publish();
        }

        [ClientRpc]
        private void RpcEndTheGame()
        {
            State.GetInstance()
                .Level(State.LEVEL_COMPLETE)
                .Publish();
        }
    }
}
This code starts the timer when the server is flagged as ready. The server then also sends over the time to the clients via the [SyncVar] timer field. RPC calls are used again to keep the state up-to-date. This behaviour will lead to every client getting a slightly shorter game than the server as the server will load the scene first and therefore be ready first.
A better solution to this would be to wait until all players are ready and then provide a quick three-second countdown until the game actually switches to Ready.

Game over, man. Game over!
So what happens when the timer reaches 0? A bomb explodes? Err, no. Currently all that happens in the level state gets changes to Complete. Let's make it do slightly more than that. First though, let's delete the Change scene button and ChangeSceneButton code. We're not going to need that again.
Next up, we'll add the following code. This subscribes to when our level state is set to complete and displays either a client or a server UI for the level being complete. The reason these are different is the server is allowed to take all players back to the lobby screen to choose the next level, or quit. The clients can only choose to quit.
// UI/Level/LevelCompleteUI.cs

using GameState;
using UnityEngine;
using UnityEngine.Networking;

namespace UI.Level {
    class LevelCompleteUI : MonoBehaviour {

        public GameObject levelComplete;
        public GameObject clientLevelComplete;
        public GameObject serverLevelComplete;

        public void Start()
        {
            State.GetInstance().Subscribe(
                new StateOption()
                    .LevelState(State.LEVEL_COMPLETE),
                ShowLevelComplete
            );
        }

        public void ShowLevelComplete()
        {
            if (levelComplete == null || clientLevelComplete == null || serverLevelComplete == null) {
                return;
            }

            StartCoroutine(EnableScoreboard());
        }

        public void ReturnToLobby ()
        {
            NetworkManager.singleton.ServerChangeScene("Lobby");
        }


        private IEnumerator EnableScoreboard ()
        {
            yield return new WaitForSeconds(1f);

            levelComplete.SetActive(true);
            if (State.GetInstance().Network() == State.NETWORK_CLIENT) {
                clientLevelComplete.SetActive(true);
            }
            else {
                serverLevelComplete.SetActive(true);
            }
        }
    }
}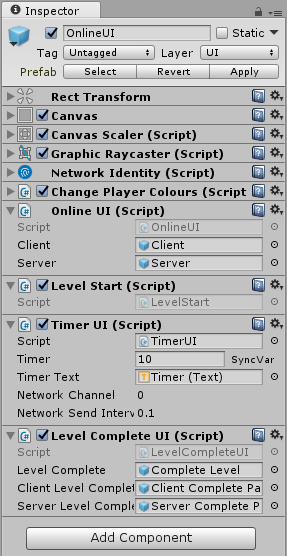
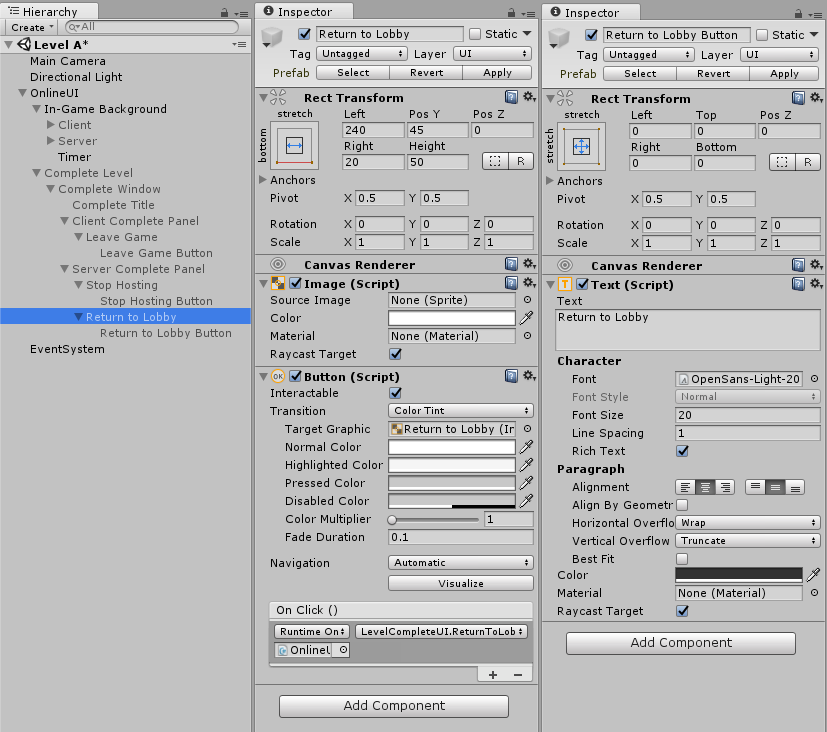
The following shows how we build these screens. There's quite a few of these:
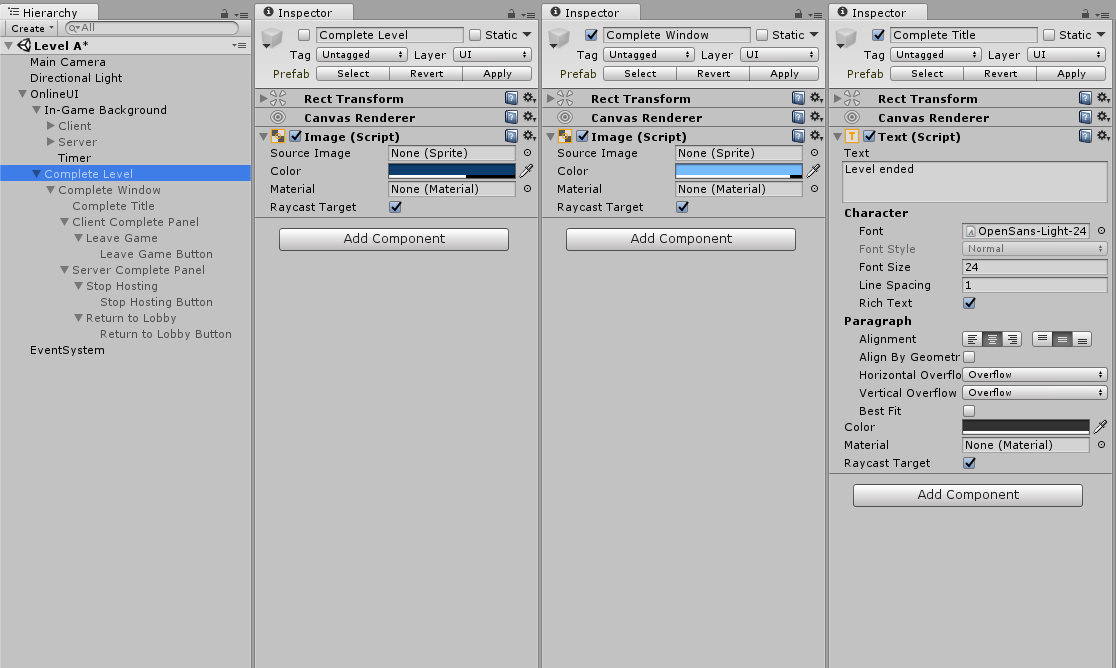
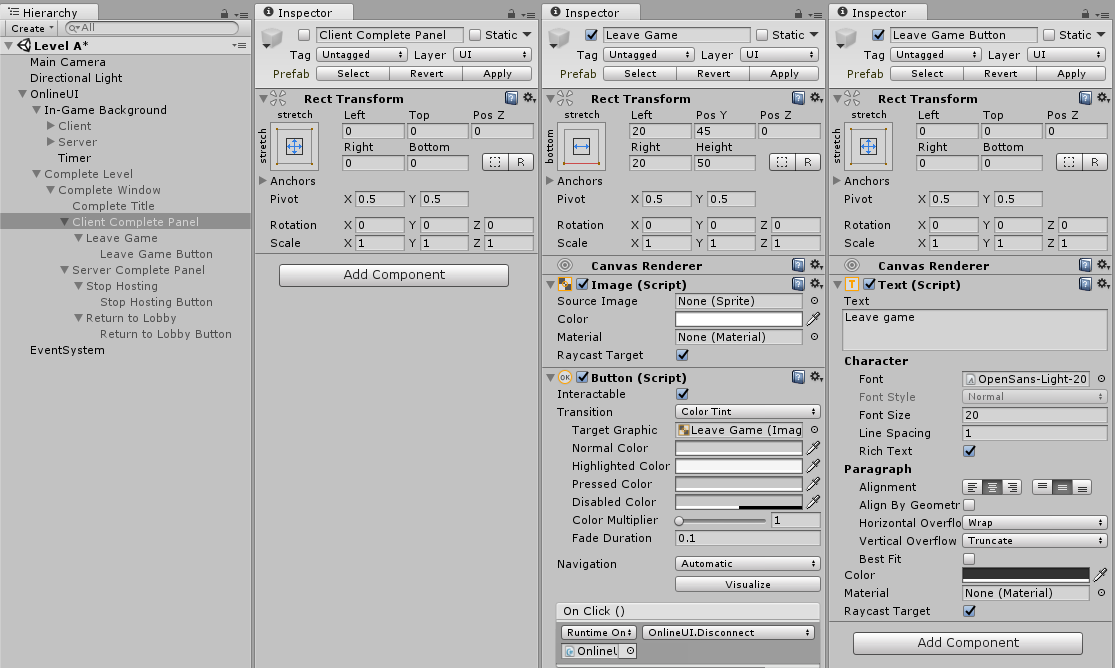
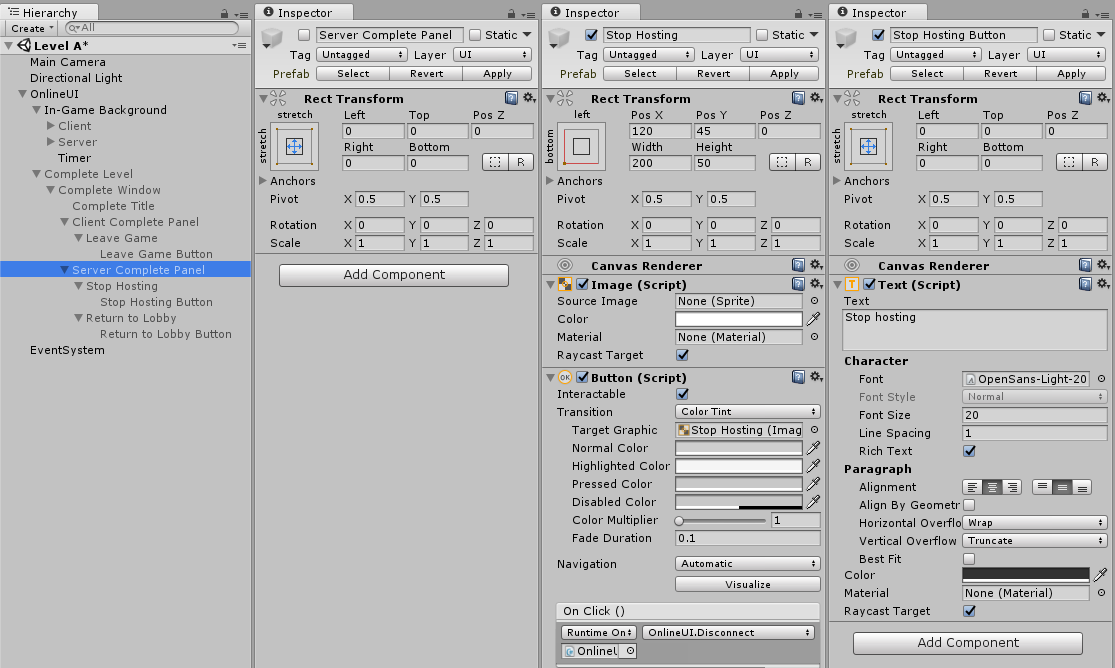
Our final output should look something similar to this video:
If you want the code for this blog and all of the blogs so far, you can get it from github.com/dittto/unity-multiplayer-8.