Multiplayer 10. A model's model

Uniformity's a good thing. When building cars you want to make sure every piece is the same as it's siblings, so that they're all equally reliable. If not, then hi Alfa Romeo!. When it comes to games, on the other hand, players like to add some personality into character on screen, or, at least, games developers seem to think they do.
Currently, with what we've been building so far, the players are all defined by cubes. These, by default, are grey, but depending on their choice of team, can be either magisterial blue or irreverent red. This isn't exactly choice, nor even the illusion of choice.
To counter this, we're going to create the basis for allowing a player to choose their own customisable model. We're not actually going to cover that choice, but we will cover changing the player model at runtime based on options chosen, and finally retire the colour-changing code.
Bye, bye, colour code
Let's start with the ending then. That colour-changing code can be removed from the OnlineUI prefab and the code for it deleted.

What makes a model?
We're going to use a simple script for deciding what a model should look like. It should be easy to extend in future for your own needs. For our example, we're going to base the player model on what team they're on.
// Player/Model.cs
using UnityEngine;
using Player.SyncedData;
namespace Player {
public class Model : MonoBehaviour {
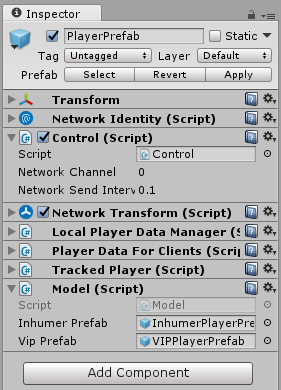
public GameObject inhumerPrefab;
public GameObject vipPrefab;
private GameObject currentModel;
private bool isPlayerCharacter = false;
public void Awake ()
{
PlayerDataForClients playerData = GetComponent<PlayerDataForClients>();
ChooseModel(gameObject, playerData.GetTeam());
playerData.OnTeamUpdated += ChooseModel;
}
public bool IsPlayerCharacter ()
{
return isPlayerCharacter;
}
public GameObject GetCurrentModel ()
{
return currentModel;
}
private void ChooseModel (GameObject current, int team)
{
if (team == PlayerDataForClients.TEAM_INHUMER) {
AddModelToPlayer(inhumerPrefab);
UpdatePlayerColour(team);
return;
}
if (team == PlayerDataForClients.TEAM_VIP) {
AddModelToPlayer(vipPrefab);
UpdatePlayerColour(team);
return;
}
isPlayerCharacter = false;
}
private void AddModelToPlayer (GameObject prefab)
{
Destroy(currentModel);
currentModel = Instantiate<GameObject>(prefab);
currentModel.transform.SetParent(transform);
}
private void UpdatePlayerColour (int team)
{
isPlayerCharacter = true;
foreach (MeshRenderer renderer in GetComponentsInChildren<MeshRenderer>()) {
renderer.material.color = team == PlayerDataForClients.TEAM_VIP ? Color.red : Color.blue;
}
}
}
}
The above code shows that whenever a new player is created, events are added to check what state the player's team is now, and whenever the team changes. Depending on the team, the player model is swapped between prefabs, and the colour is applied to that prefab. We could easily just set the colour of the prefab before hand, but this code is here to show how the colour can be changed in this way.
There is an isPlayerCharacter in this class that's not used here. We'll use that next to simply stop the player moving unless it has a team chosen. There are alternative, better ways to do this, but this is effective and quick without creating too much technical debt. The following shows how to stop the player, by updating the Control code.
// Player/Control.cs
using UnityEngine;
using UnityEngine.Networking;
namespace Player {
public class Control : NetworkBehaviour {
public void Update ()
{
if (!isLocalPlayer || !GetComponent<Model>().IsPlayerCharacter()) {
return;
}
...
}
}
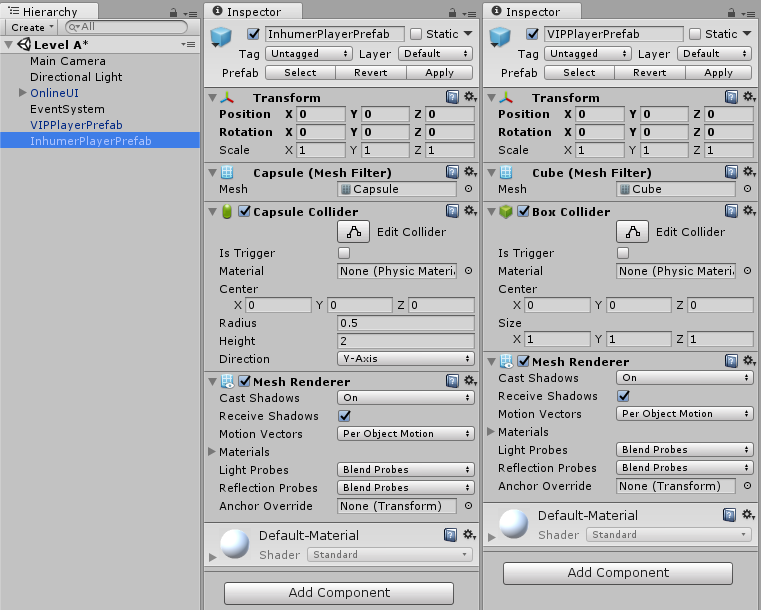
}Now we've got our code, we can remove our trusty, grey cube from our PlayerPrefab and mock up some new prefabs for our teams.
If you like, you can watch a video of the final product:
And, as usual, you can find the code for this blog post here: github.com/dittto/unity-multiplayer-10.