Releasing a PHP-powered AWS Lambda

Last blog I went through how to create a Docker container that can run various versions of PHP in AWS Lambda, but as it was getting a little long, didn't actually cover making it live in AWS.
I'm going to cover both through the AWS Console and through CLI commands (where appropriate) for this as knowing both is quite useful.
AWS Lambda with Docker containers is kind of the holy grail of testing and small-scale development. A platform that only exists for the number of seconds you need it and (unless you have an odd project) rarely runs into the same memory and storage space issues that can plague a standard server or even one on EC2. Best of all, if you have something that suddenly becomes popular, Lambda will fairly-infinitely scale as long as you can afford for it to, and if not you can limit it to within your means.
If you back that with a website mainly hosted on S3 then you've got a fantastically cheap yet robust project.
Anyway, on to making our Docker container live. The following assumes you've installed the aws-cli for your operating system and set it up correctly. If you've used a different profile that's not default then you'll need to remember to change the profile on each command.
ECR
First things first then is we need somewhere to store our Docker container. These are typically stored in a registry of containers. Thankfully this is really easy in AWS as they have the Elastic Container Registry (ECR). You can pair this with the Elastic Container Service (ECS) to run you docker containers on EC2 servers, but having run the company's sites on these for a couple of years I found they're quite wasteful so we don't use ECS any more. ECR, however, is great.
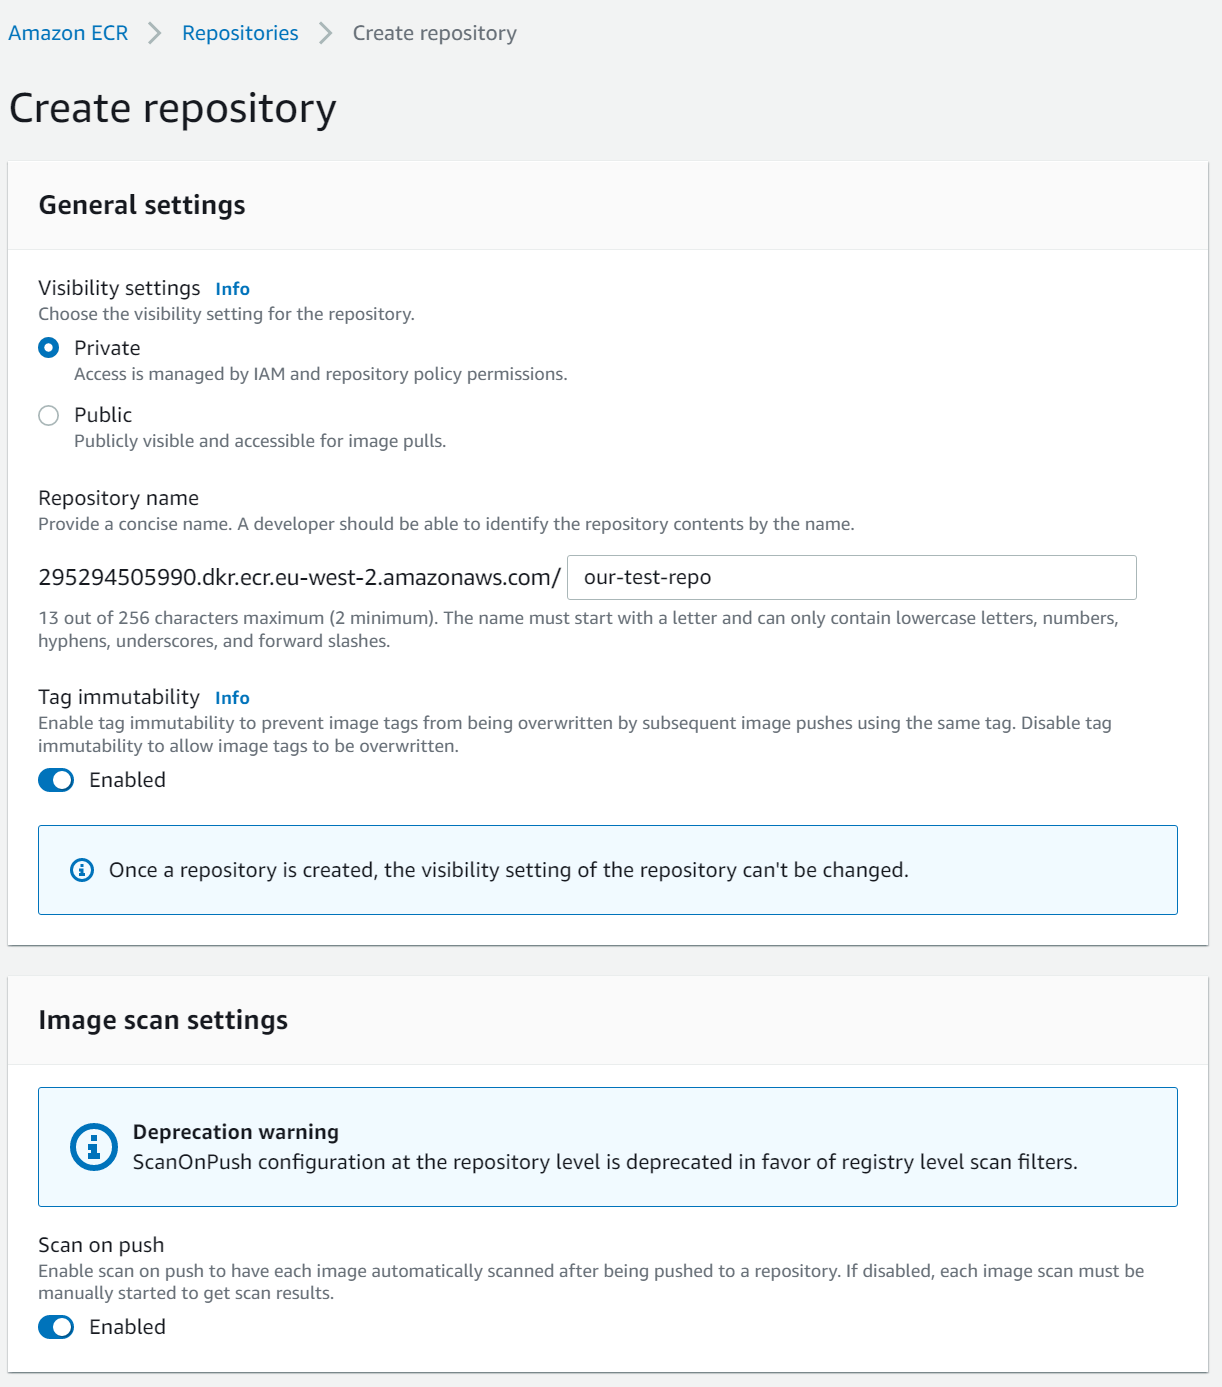
A little note here, when using aws commands, always make sure you set a region and a profile. The aws-cli command to replicate the above is:
aws ecr create-repository --repository-name our-test-repo --image-scanning-configuration scanOnPush=true --image-tag-mutability MUTABLE --region eu-west-2 --profile dittto
Both of the above simply create a new repo called our-test-repo. In the AWS Console, make sure you set your region correctly using the dropdown in the top right or you won't be able to find your new container registry. These will both create my registry with the ARN (resource name that we'll use to link things to it in future) arn:aws:ecr:eu-west-2:295294505990:repository/our-test-repo and a URI of 295294505990.dkr.ecr.eu-west-2.amazonaws.com/our-test-repo.
Pushing to ECR
In the last blog we used the following command to build our Docker image:
docker build -t php-lambda-test .Now we have an container registry set up we can push our image to it.
First up though, we need to log in to AWS ECR via command line so we can then tell Docker to login. The following code shows how:
aws ecr get-login-password --region eu-west-2 --profile dittto | docker login --username AWS --password-stdin 295294505990.dkr.ecr.eu-west-2.amazonaws.com

# result:
#990.dkr.ecr.eu-west-2.amazonaws.com
#Login Succeeded
Now it's just a case of tagging our Docker image and pushing it ECR. For test and laziness-while-blogging purposes we'll use latest.
docker tag php-lambda-test:latest 295294505990.dkr.ecr.eu-west-2.amazonaws.com/our-test-repo:latest
docker push 295294505990.dkr.ecr.eu-west-2.amazonaws.com/our-test-repo:latest
The local image name and the one in ECR don't need to match but it helps when coming back to something a couple of months later, otherwise called do as I say, not as I do.
Set up IAM
Now we've got our container registry, we can set up the Role and Policy for our Lambda command. I find this is best done through the AWS Console.
Go to the IAM section and create a new policy. Give it the following body and name it something memorable. I've called mine php_lambda_test due to a lack of imagination but you can go with whatever, suck as sneeds_seed_and_feed if you want.
{
    "Version": "2012-10-17",
    "Statement": [
        {
            "Sid": "LambdaECRImageRetrievalPolicy",
            "Effect": "Allow",
            "Action": [
                "ecr:GetDownloadUrlForLayer",
                "ecr:BatchGetImage"
            ],
            "Resource": "arn:aws:ecr:eu-west-2:295294505990:repository/our-test-repo"
        }
    ]
}
This says that if our Lambda has this IAM policy then it can download the Docker image from the registry but nothing more.
Next, create a new role with another original name. I went with php_lambda_test_role, but you could go with formerly_chucks (best Simpsons gag ever) if you desire.
Add the policy we created above, and the AWS-managed policy AWSLambdaBasicExecutionRole. This extra policy will allow the Lambda to store logs in Cloudwatch so we can debug it (and get similar output to what we saw last time using docker logs).
After creating our role you'll get an ARN similar to arn:aws:iam::295294505990:role/php_lambda_test_role.
Lambda
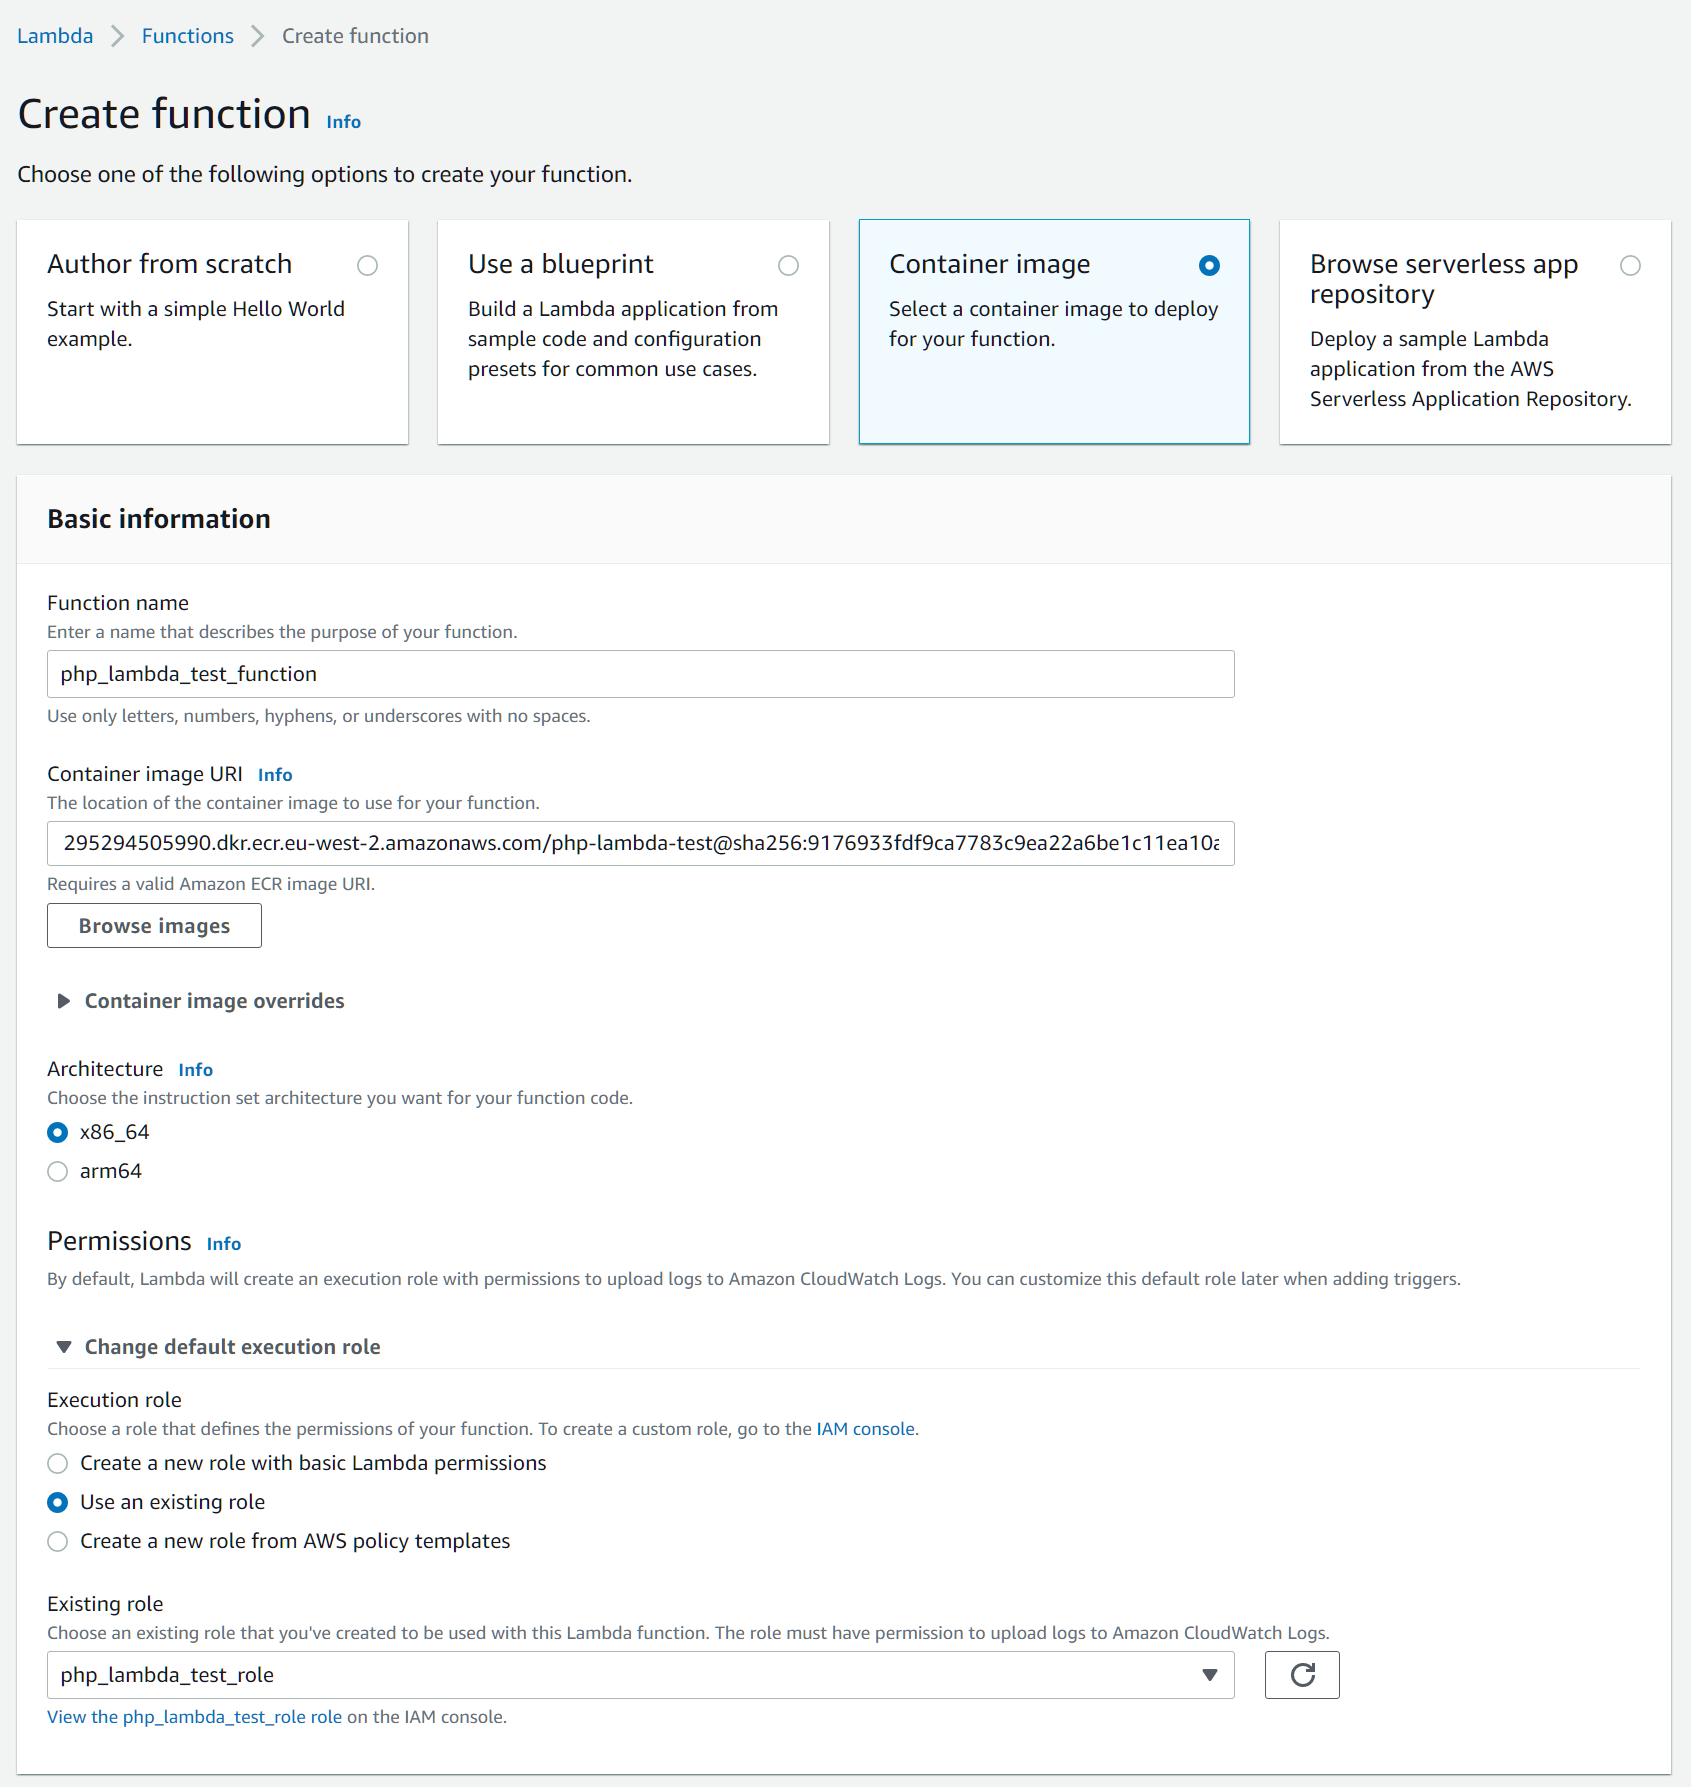
Now we have our Lambda we can create our function. We're creating one from a Container image so we need to choose a name. Again originality is key here so I've gone with php_lambda_test_function, browse and select our container image URI (see above).
Make sure you open the permissions section to choose the new role we created. In my case that's php_lambda_test_role.
From the command line, this looks like:
aws lambda update-function-code --region eu-west-2 --profile=dittto --function-name php-lambda-test-function --image-uri 295294505990.dkr.ecr.eu-west-2.amazonaws.com/our-test-repo:latest If you've already created the Lambda, and it just needs an update to the latest code, you can use:
aws lambda update-function-code --region eu-west-2 --profile=dittto --function-name php-lambda-test-function --image-uri 295294505990.dkr.ecr.eu-west-2.amazonaws.com/our-test-repo:latest
Testing
Now we've pushed our code up we can test use the command line or AWS Console to test it.
In AWS Console, click on your function and go to the Test tab. Set the Event JSON to the following and then tap Test.
{
  "queryStringParameters": {
    "hello": "world"
  },
  "requestContext": {
    "http": {
      "method": "GET"
    }
  }
}
This should pop up with a little green box with the response Execution result: succeeded. Tapping this will show you more details on your request.
You can also go to Cloudwatch > Logs > Log Groups > /aws/lambda/php-lambda-test-function (if that's what you called your AWS Lambda) and then click on the latest Log stream to view the output.
From the command line, you can use the following command:
aws lambda invoke --region eu-west-2 --profile=dittto --function-name php-lambda-test-function --log-type Tail --query 'LogResult' --output text --cli-binary-format raw-in-base64-out --payload '{"queryStringParameters": {"hallo":"world!"},"requestContext": {"http": {"method": "GET"}}}' output.txt | base64 -id
cat output.text
This will do the same as the local curl did, or the test through AWS Console. In this case, however, to see the debug you'll then have to cat output.txt.
Function URL
Once we're satisfied that this is working well then it's time to get our AWS Lambda to a place it can be accessed.
Go to your Lambda in the AWS Console and go to Configuration > Function URL. Click on Create function URL, choose your Auth type (for testing I choose None but you'll probably want AWS_IAM if building a larger application).
This will generate a new URL that links directly to your Lambda. No playing around any more with API Gateway for a simple passthrough.
Now we can use a tool like curl on command line to call our function:
curl -X POST -H "Content-Type: application/json" "https://aaaaaaaaaaaaaaaaaaaaaaaaaaaa.lambda-url.eu-west-2.on.aws/" -d '{"queryStringParameters": {"name":"Ben"},"requestContext": {"http": {"method": "POST"}}}'And now we have a live AWS Lambda function being powered by PHP. Next up I'm going to cover how to update this all automatically using GitHub Actions.